

While working with Google Sheets and Excel, you may need to name a given cell or entire column. This relieves the users from the confusion that arises while working on the Sheet. To new users, adding a column and cell name is stressful. Do not panic because this article covers you through the steps and workarounds that can be followed to add cell and column names.
Naming Cell in Google Sheets
Table of Contents
Let us discuss how to name a cell and a column of cells in Google Sheet.
To name cell
Here are the steps to follow while naming a specific cell in Google Sheets.
1. Visit the Google account and log in using your email detail (That is, https://www.google.com/account).
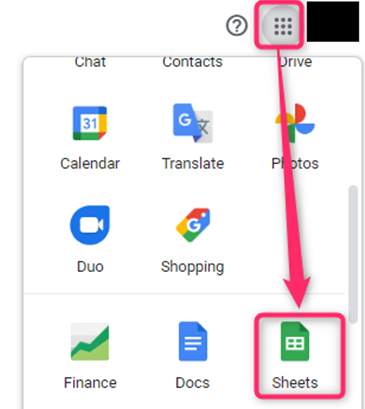
2. From the Google Apps, click on the Sheets icon and select the existing Sheet.
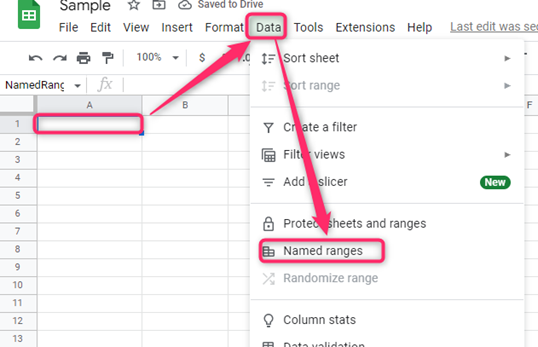
3. Locate and click on the cell you want to name.
4. Click on the Data tab on the toolbar. From the drop-down menu, choose the Named ranges button. This will open a Named Ranges pane on the right side of the screen.
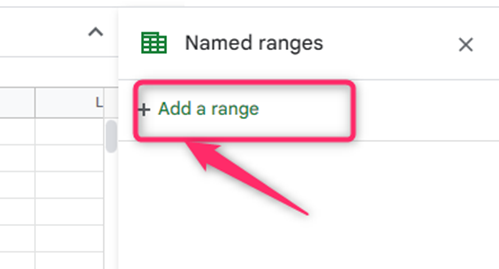
5. Click on the Add a range button from this pane.
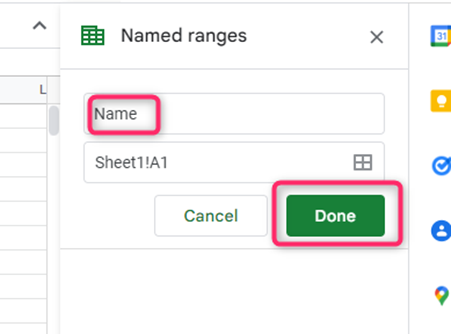
6. Add the name of the cell, and click the Done Button.
To remove a name from a cell
Here are the steps to follow:
1. Locate and click on the cell you want to name.
2. Click on the Data tab on the toolbar. From the drop-down menu, choose the Named ranges button. This will open a Named Ranges pane on the right side of the screen.

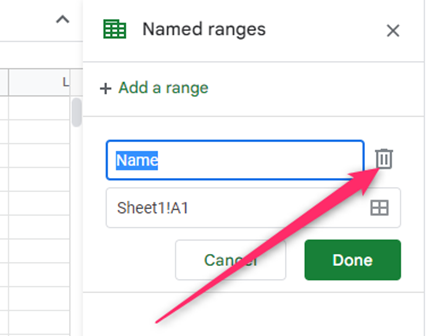
3. Locate the name of the cell you want to remove. Click on its Pencil icon.

4. Then, click on the Delete icon next to the name of the cell.
To name column headers
Here are the steps to follow:
1. Visit the Google account and log in using your email detail (That is, https://www.google.com/account).
2. From the Google Apps, click on the Sheets icon and select the existing Sheet.

3. Enter the column headers on the first row of your Sheet as shown below.
4. Highlight the added column headers and click on the View tab on the toolbar.

5. From the menu, choose the Freeze button. Then, Select row 1 (The row that contains the column headers).
Naming Cell in Excel
Let us discuss how to name a cell and a column of cells in Excel.
To name a cell
Here are the steps to follow:
1. Open the Excel application.
2. Click on the cell you want to name.
3. Locate the Name box on the left side next to column indexes.

4. Enter the name of the cell, and hit the Enter button.
To remove a name from a cell
Here are the steps to follow:
1. Open the Excel application.
2. Click on the cell you want to remove the name.
3. Locate the Name box on the left side next to column indexes.

4. Replace the name with the cell index, and hit the Enter button.
To name column headers in Excel
Here are the steps to follow:
1. Open the Excel application.
2. Enter the column headers on the first row of your Sheet, as shown below.

3. Click on the View tab on the toolbar, select the freeze pane and choose the Freeze Top Row Button.