Microsoft word has an inbuilt feature that enables one to create a table easily. This takes the number of the row and column as input, and then it outputs a well-designed table. However, after creating the table, you may realize that the rows are fewer than you needed. Don’t panic! This article got you covered. You can add another row to the already created table.
Let us discuss some of the common ways that can be used to add rows to your table.
A. Table Layout Tool
Table of Contents
How to add a row anywhere in the table
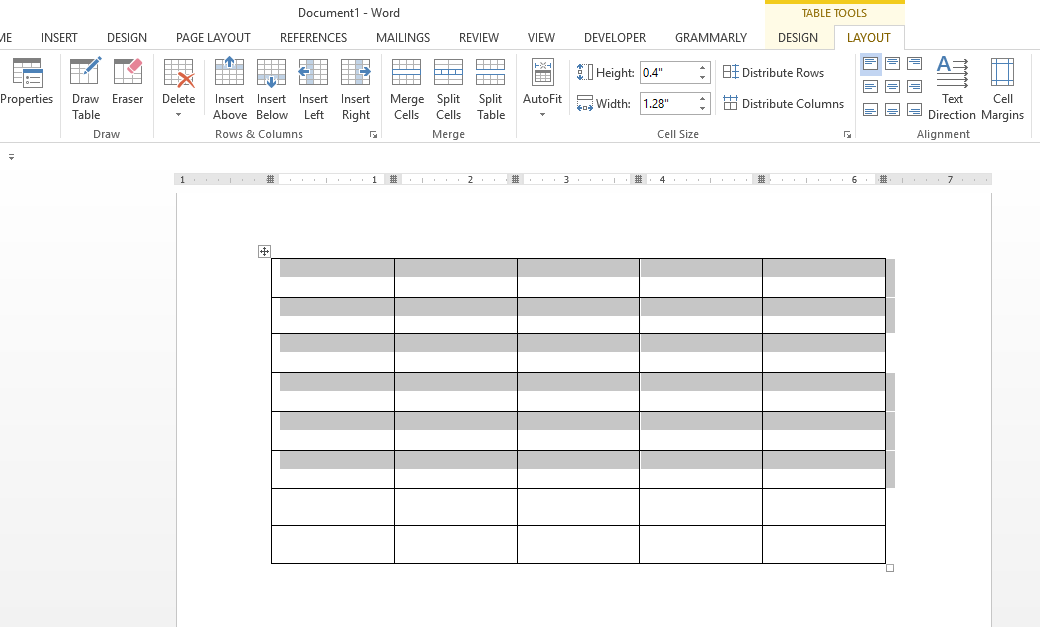
Immediately after creating a table, a table layout tool is launched. You can use this tool to alter the layout of your table. Below are the methods to add another row to your table using this tool.
1. On the document that has the table, click on this table.
2. After clicking the table, Table Tools tabs are launched on the ribbon. Go ahead and click the “Layout” tab.

3. On the Layout tab, there’s a “Rows& column” section. Select either the Insert Above or Insert Below button to add another row. You will have your single row added to the table.

Adding a row to a specific location
Other times you may need to add another row to a specific location in your table. The following steps will guide you to do so;
1. Open the document that has the table. Then, click on the row that will be near the inserted row.
2. On the ribbon, click the “Layout” tab under the Table Tools column.

3. Then, locate the “Rows & column” section.
4. If you want to add the row to appear below the selected row, click the Insert below button. Else click the Insert Above button.

How to add Multiple Rows in a table
Also, you can add more than one row.
1. After opening the document that has your table, highlight the already created rows. Note: the number of rows highlighted should equal the number of rows you want to insert into your table.

2. Then, on the ribbon, click the “Layout” tab, which is under the Table Tools column.
3. Then, locate the “Rows & column” section.

4. If you want to add the row to appear below the selected row, click the Insert below button. Else click the Insert Above button.
5. On clicking, new rows will new added to your table.

B. Using Table Drop-Down Menu
The table’s drop-down menu can be used to add another row to your table.
Steps;
1. Open the document that has the table. Then, click to the row that will be near the inserted row and right-click.
2. After right-clicking, a drop-down menu is displayed. Locate the “Insert” button and hover your cursor over it.

3. Another drop-down menu opens next to the insert button.
4. If you want to insert the row below the selected row, click the “Insert Row Below.” Else, click the “Insert Row Above.”

