People love Google docs because it’s easy to use. For instance, it’s user-friendly and has a keyboard shortcut. With google docs, you can track changes, and access many other features. As we all know, a neat, and clear cover page encourages your readers to read your document hence gain what has to offer. Cover pages mostly give your reader a hint on what they are about to get. Therefore, your cover page should be impressive and contain all the required data for your work or document.
You can come up with a neat or clear cover page for assignments or projects hence saving cost and time. The good news is that it’s easy and you don’t need people to design it for you. If you are looking for the easiest and convenient way to design your cover page, then you are in the right place.
We have different options. You can create your cover page from the foundations or use the templates. Google docs have document templates that make it easy for users. We will learn all of them and see what favors you.
How to create a cover page on Google Docs from Scratch
Table of Contents
Step one: Open Blank page
- After Opening google Documents, Click “blank” to create a new document under Start a new document.

Step two: Setup page
It involves page setup. let’s set up our document size, layout, margin, and color required.
- Click files and then click page set up that will be easy.
- Alternatively, if you are not familiar with all these, you can set it to default.
- After setting up your page as you want, click” ok.”

Step three: Insert 1 cell table
Insert tables. Tables, make it easy to define your working space (cover page space).
- Click Insert and choose tables.
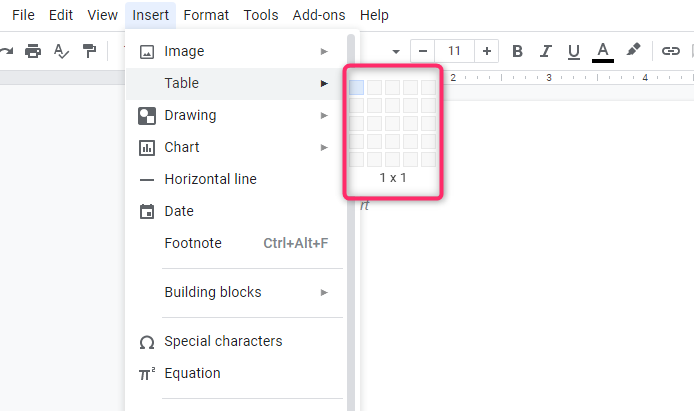
You have to extend the size you need your cover page to cover.

Step four: Customize the cell
You can add an image to make your cover page attractive. For example a logo or company image,
- Click insert and choose an image.
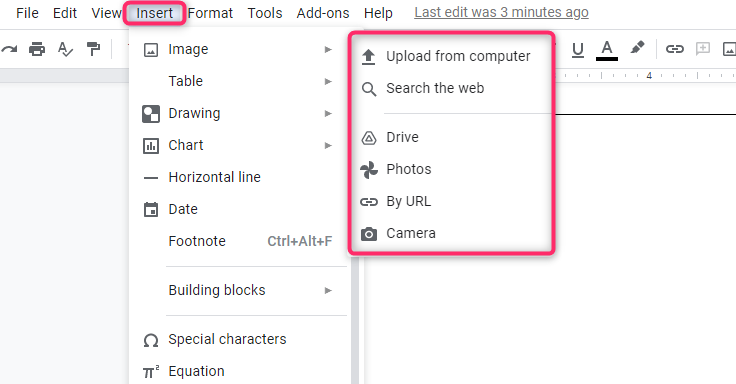
Google docs allow you to make some simple modifications to your images. Like contrast, transparency, and position adjustment, and many others.
You can upload your image from various sources.
- Google photos.
- Internet.
- Google drive.
- Your device. (computer and phones)
So, it’s up to you to look for an amazing image. You can add a wrap text, or if your image is well defined, you are good to go.
Step five: Add Text and customize the image
- Add your texts; remember you can customize your texts in terms of color, fonts, and many others.

- Use the drawing tool to make it easy to drag the text over the image. The drawing tool provides an option of adding text, so this will be easy.
If you are done with your cover page, download it in any format you want. Just navigate
File>download (as choose any format you like).
How to create a cover page using Templates.
Google docs have a lot of pre-built templates you can choose to come up with a cover page. Also, you can find other features to make them look impressive. They do look childish, so you have to modify and make them look impressive. Google doc has a lot of templates thus you don’t have to worry about font, theme, and color. Let’s do this.
Step one: Open template gallery
- Open google Documents, then click the template gallery. Scroll down to education and choose what pleases your eyes.
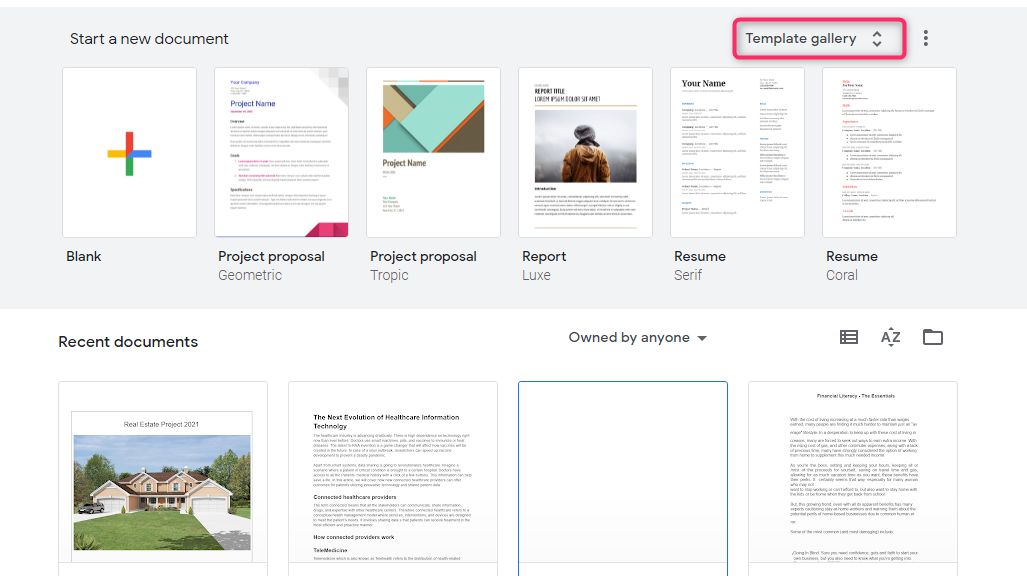
These templates were made for specific reasons, so choose where your project or assignments lies. If its law picks legal if its education looks for it medicine the same.

Step two: Customize the template
- Once you have your template, you can customize it to replace the image, color, contrast the image, adjust the position, and many more.
- If you want to tweak the easy image, just double-click.
- if you want to choose another image, just right-click on the image. For the color
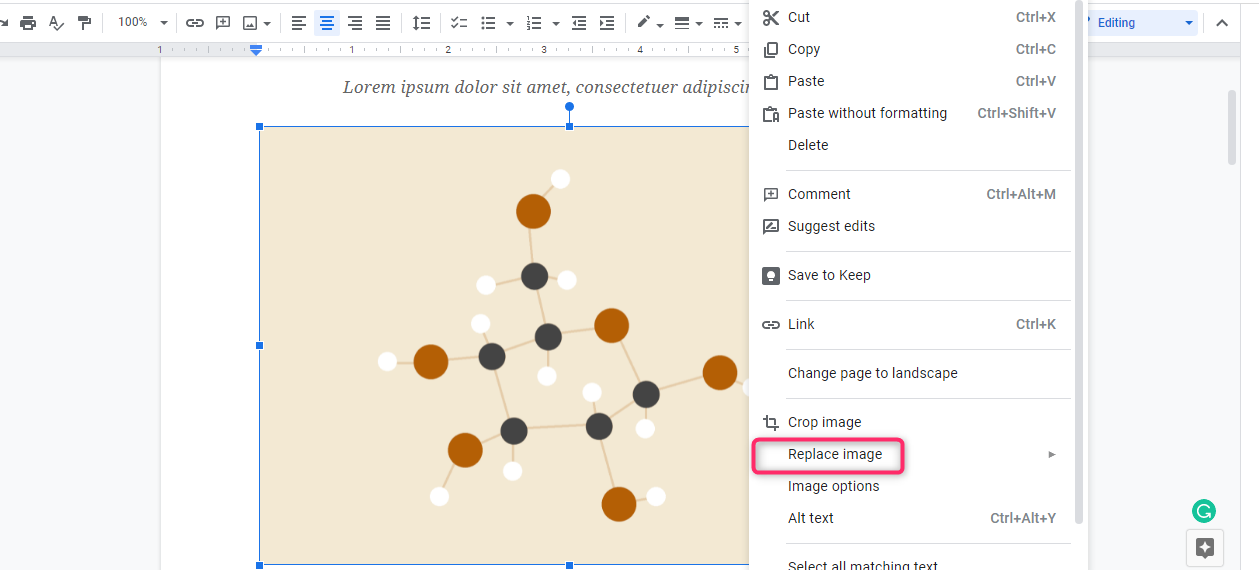
- After clicking the image option, you will see a new panel where you will pick recolor and choose the color that goes with your project or assignment.
Step three: Replace Text change colors
Replace the dummy text.
- Double click on them and replace them with appropriate text. Templates have their color palate; to main the same color across your project, take the colors at the bottom line.

Step four: Number the pages
- Navigate insert>header page number. To some people, header and page number will be viewed immediately after clicking insert down the list while other headers and page numbers will be the same, so you have to choose the suggestions.
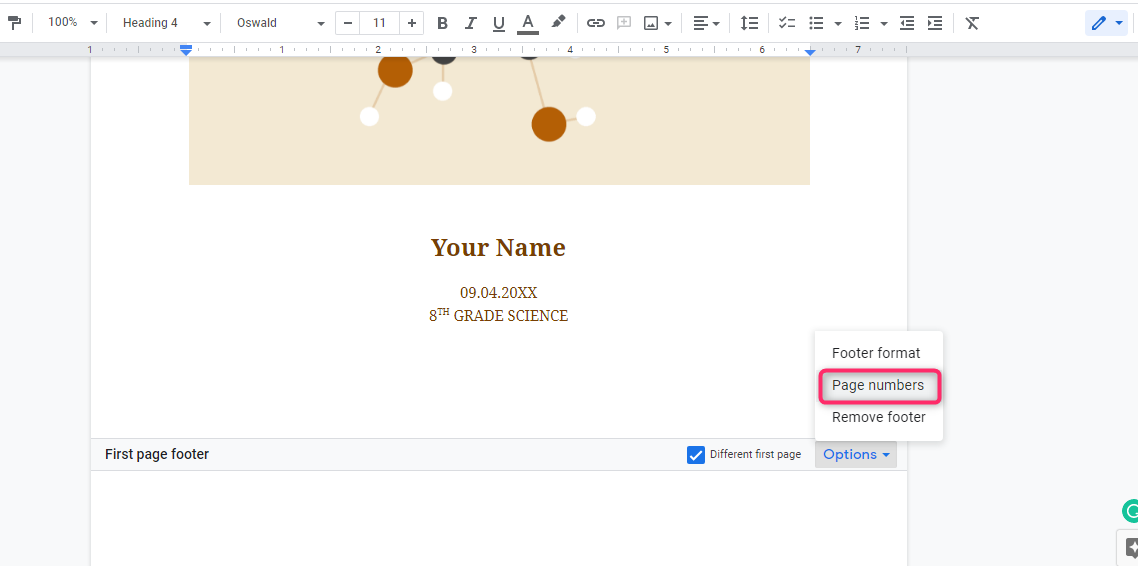
After you have done all this, you can download it to use it offline
- click file>download.
The best thing about this template is that you can do anything with it. You can adjust the position, color, fonts, and many more. For instance, a company logo. You can move it around the way you want and add wrap text over it. It’s perfect for anyone who needs a cover page for anything.
Lastly, if you don’t find any template that suits you from the given gallery template, you can download them on the internet. They will show you how to upload or use them. Google docs have a lot of features that are making our work easier. If you are new to google docs I’m sure you will enjoy it as it’s easy to use and understand, with well-defined icons, and keyboard shortcuts.
Conclusion
I hope this was helpful. Also, there are other options you can check out like canvas, lucidpress, and many others. To improve your skills and work, try out other applications because they do have different features and applications. Check our blog for more tricks and knowledge concerning google docs and other applications.

