
A picture border is a decorative edging for a picture like a photograph or painting. It makes showing the image easier, sets the picture apart from its surroundings, and integrates it with the surroundings. Every picture is now displayed on a digital display that can be a smartphone, computer screen, or tablet. The images are usually shown with colored backgrounds but sometimes in back and white. Using a border means that there is a separation between the photo and the background. It is important because it defines the visual limits of the image. This is especially important when using a black-and-white photo as it helps avoid tonal bleeding between the background and the image. The image is also made more presentable when it is added around an image. It forces the one viewing the image to change his viewing priorities and concentrate on the image inside the border without getting distracted by the objects around or the background and foreground colors in the image. The viewer is forced to look at the image and feel its allure without its surroundings distracting the attention of the viewer from it. GIMP photo editing application allows you to add borders to your image using simple, easy-to-follow steps. You use a filter that adds the border around the image and specifies the border’s thickness and color. We will provide you with the steps that you can use to add a border around an image in GIMP.
You can add a border around the image in GIMP by using the following steps:
1. Open GIMP on your computer.

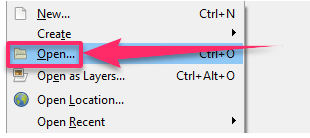
2. Go to the File menu.

3. Click on Open to load the image in GIMP.
4. Go to the Filter menu.

5. Select the Decor submenu.
6. Click on Add Border.

7. A dialog box is opened to allow you to specify a few options.
8. Set the same border size for the top and bottom of the image and as one size for the right and left instead of giving the size of each border edge individually.

9. Set the Delta value on the color option. It allows you to make a raised effect by changing the colors of the border to add the suggestion of a light source.

Gimp also allows you to make more effects by combining different thin borders into a larger one by repeating the Add Border script a few times with various settings. You can also shrink the size of the border using the shrink command. In this situation, the Shrink command is most helpful because it enables you to reduce the size of a selection in all directions uniformly. You can prevent overlaps by using the Shrink command with a set of half your desired border width in pixels. Now that you know how to add a border to your images, you can repeat this process for any other image you would like to have a border. All the best!