

A good document should have a reference. Thankfully, Ms. Word has numerous tools that can be used to add a reference to your document. In this article, we shall discuss some standard references that can be added to your Word document.
Adding Citations and Bibliography
Table of Contents
Citations and Bibliography are good examples of references in a Word document. Here are the steps to work with this Word tool:
1. To get started, locate the Word application on your Pc. Double-click on it to open the application. To create a new document, click the File button on the toolbar. Then, locate the New button.
You can also use the keyboard shortcuts to open a new document. That is, CTRL + N. Alternatively, open an existing document.

2. On the toolbar, locate the References tab.

3. In the Citations and Bibliography section, choose to add a citation or Bibliography.

To add citation
Follow these steps:
1. Click the Insert citation drop-down button.
2. Choose the already saved citations or the Add new source button from the menu.

3. If you choose to add a new Source, a dialogue box will open. Fill the space and hit the Ok button.
Type of source – Here, click on the drop-down button and select the type of source you want to create a citation.
Author- Add the name of the Author
Title – In this section, add the title of the documentation.
Year- The year the documentation was published.
City- The residing city of the author.
Publisher- Who published the documentation.

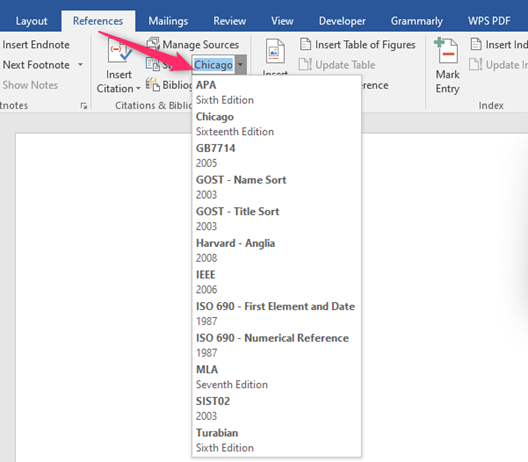
4. To change the citation style, click the Style drop-down button and select the style you want.
To insert Footnotes
Steps to follow:
1. On the toolbar, locate the References tab.
2. In the Footnotes section, choose the Insert footnote button. A footnote editor will open at the bottom of your page.

3. Add your footnote details there.
Use the EndNote Add-ins feature to add References in Word
Steps to follow:
1. Visit the official page of EndNote, and purchase the latest version of Endnote. Visit https://endnote.com/downloads
2. On the Get started section, click either the Buy EndNote button or the Request trial button.

3. Setting up Endnote.
Save the Endnote program folder on your device. That is, c:\Program files((x86)\EndNote
Open your Word application. From the toolbar, locate the File button.
Click on the Options button, and choose the Add-ins button to open the add-ins pane.

Choose the COM add-ins option from the Manage drop-down menu. Then, click the Go button.

Click the Add button on the rightmost side of the dialogue box. Locate the folder that contains your EndNote.

4. Open the EndNote Program
5. From the top menu bar, click File > New.

6. Navigate to the location where you will save your library. For example, create a folder on the local C drive in a location unaffected by synchronizing. This is where to save your Endnote library. Example: C:\Users\(your username)\EndNoteLibraries
7. Give your library a name, and then Save.
8. You are now ready to start adding references.
