Vertical lines in Google Docs are very important when you want to subdivide a page. For instance, if you are creating a resume, newspaper, or newsletter which has pages that are divided into columns. These columns are separated by vertical lines.
Vertical lines improve the outlook of your document by making it visually appealing and neat. They make it more organized hence improving the readability of the document. This article is a guide on how to insert these vertical lines in google docs. There are four methods of adding a vertical line in Google Docs.
- Using shapes
- Using paragraph borders
- Adding lines between columns of text
- Using a keyboard shortcut
We will discuss the first method, Using Shapes, as it is the easiest and has an advantage over other methods. It gives customization options. You can choose different colors, and styles, and there are more attributes you can add to your line.
Steps to insert a vertical Line in Google Docs
Table of Contents
Step1:
- Open Google Docs via https://docs.google.com.
- Go to the document you want to add a line.
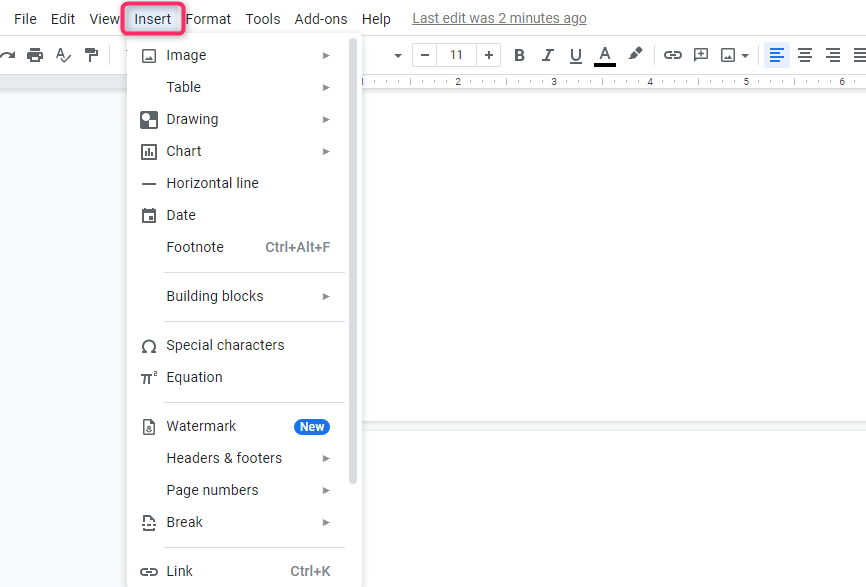
- Click on the Insert tab located at the top left corner, as shown below;

Step 2:
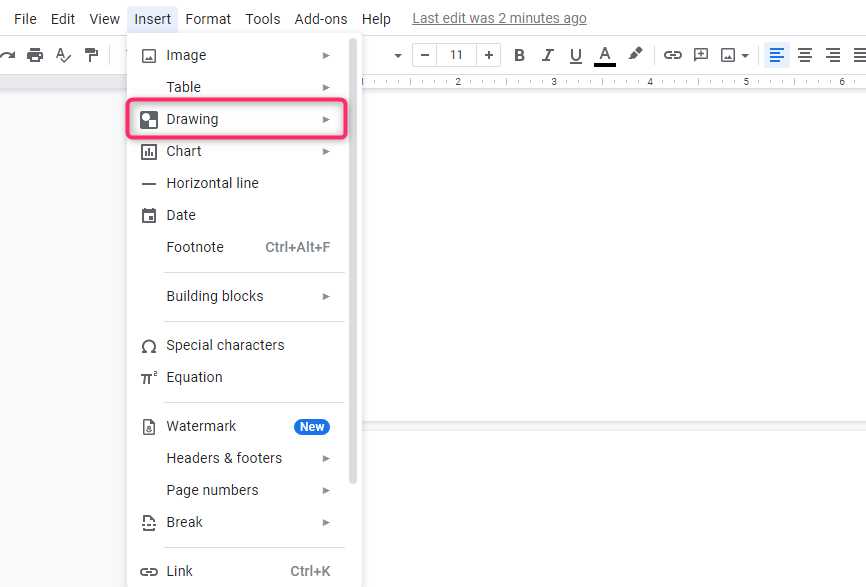
After you have clicked insert, a drop-down will appear;
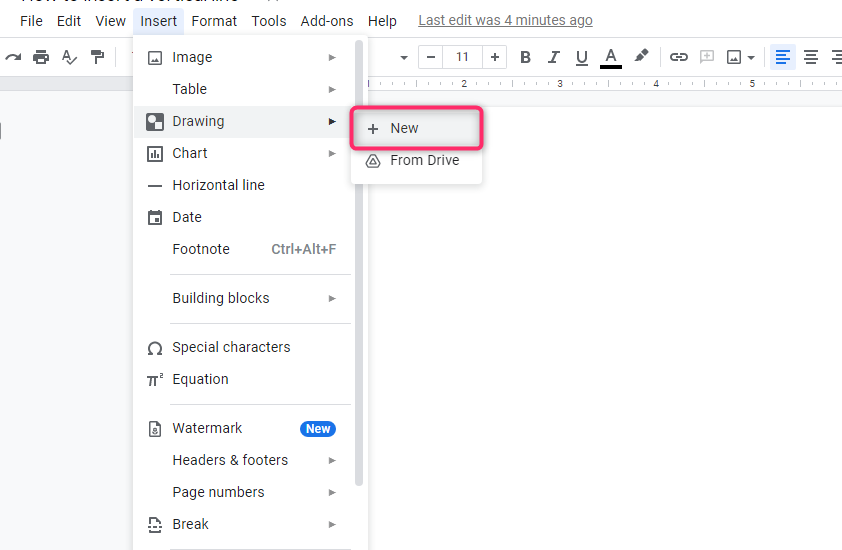
- Go to the Drawing option with your cursor, and two other options, New or From Drive, will pop.

Step 3:
- Select the option From Drive option if you already have a vertical line template saved in google drive.
- Select the New option if you want to create the vertical line from scratch.

- If you choose the ‘New’ option, a new window will open, and you can draw your line.

Step 4:
- To draw your line on the new window, toggle your cursor over the taps on the new window and click on the line tool.
- A drop-down menu will appear with different types of lines.
- In this case, you want a vertical line so choose the first option of line.
- Go to the blank area on the window, press shift on your keyboard, and drag your pointer down vertically to draw the line.

Step 5:
Once you have drawn and formatted your line to your liking;
- Click on the Save and Close button on the top right.
- The line will be inserted where your pointer is in the google document.
The other methods can also be used but are more complex and are for drawing vertical lines for different purposes.
For example, in the second method; Using Paragraph Borders,
- you create borders around your paragraphs, and at the border, you are allowed to insert a vertical line.
The third method;
- You add vertical lines in between columns of text.
The last method is a keyboard shortcut used to add a small vertical line symbol (|) in the document.
Conclusion
In Google Docs, it is not like the other word processing software like MS Word where you choose a line from the Shapes option. You have to select the drawing option to draw any shape or use the other methods to draw the line you want.

