
A flyer is a paper that is unfolded and contains advertisement content on it. A flyer contains a lot of information ranging from those of a product, upcoming event, or even a company. The good news is that making a flyer in google docs is easy. Google Docs provides a variety of templates that will enable you to create an eye-catching flyer for their respective purpose.
It is important to note that using google docs is free all you need is to access a good internet connection. For you to be able to make any document with Google Docs, ensure you have a google account because if you do not have one, then you won’t be able to create anything. This article will explain a step guide on how you can create or make your own event flyers on Google Docs.
How to make a flyer in Google Docs using Templates
Table of Contents
Step 1: Open Google Docs
Open Google Docs. Go straight to any of your browsers and search Google Docs. If you do not have a Google account, start by creating one on the google account creation page. If you have an account, just sign in.
Step 2: Choose a flyer template
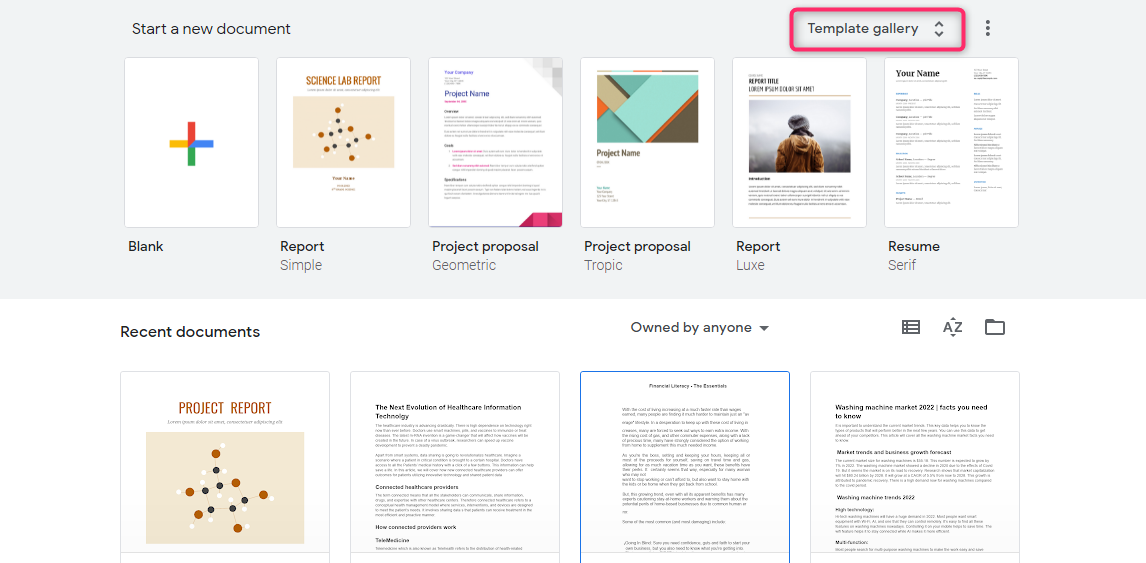
- Go to the “Template” button that is on the right side of the “Start a new document tab.”
- Under the “Start a new document tab,” you will see various options example, a blank document, and a couple of other types of templates.
- You may choose from any of the templates, but if they don’t match your expectations, just click on the galley template on the upper right side of your docs.
How to enable the template gallery button
Launch the menu
If you are unable to see the template button in step 2;
- Click on the “Menu ” button located in the upper left corner of the window (it’s in the form of a three dots icon).
Open settings
- Click on settings on the menu dropdown.
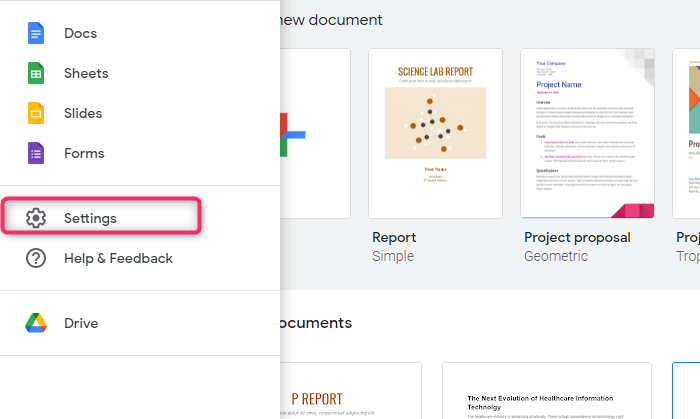
Turn on templates
- Click on the checker box under “Templates. “

- Click on the “Ok” button to actualize the templates command.
Step 3: Browse the templates
- Scroll down on the template gallery, and you will find more document templates and choose one of your choices.
- Under the template gallery, you will notice that there are “work” and “Newsletter ” templates, you may opt to use them since they are used as flyers as well. The templates are not only limited to work or newsletters; there are others like “Education” and many more.

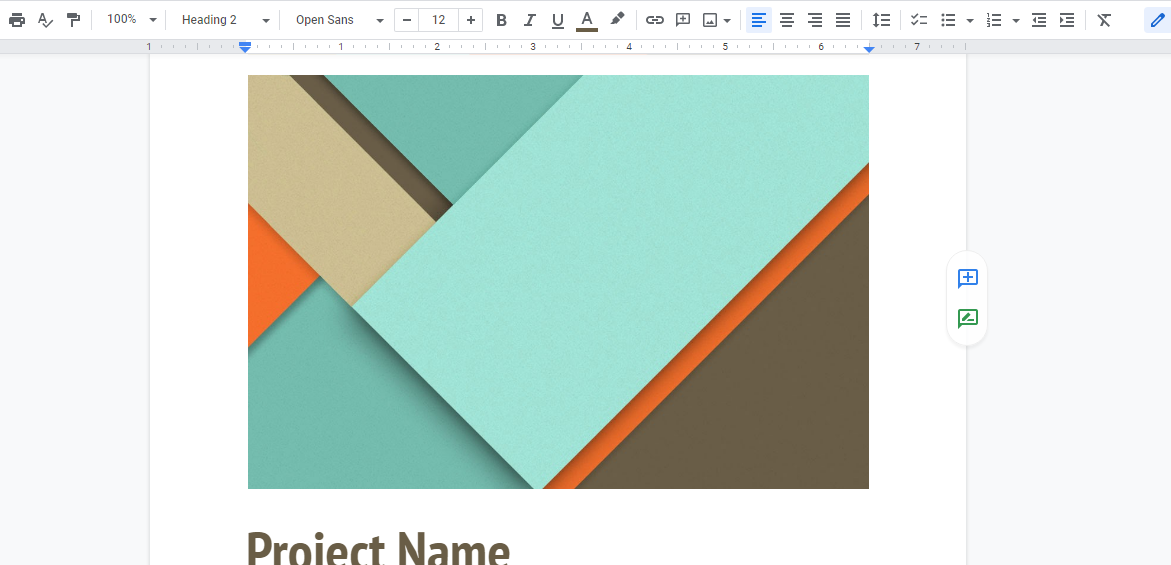
Step 8: Open the template
- Click on the template that you have chosen and click on the ok button.
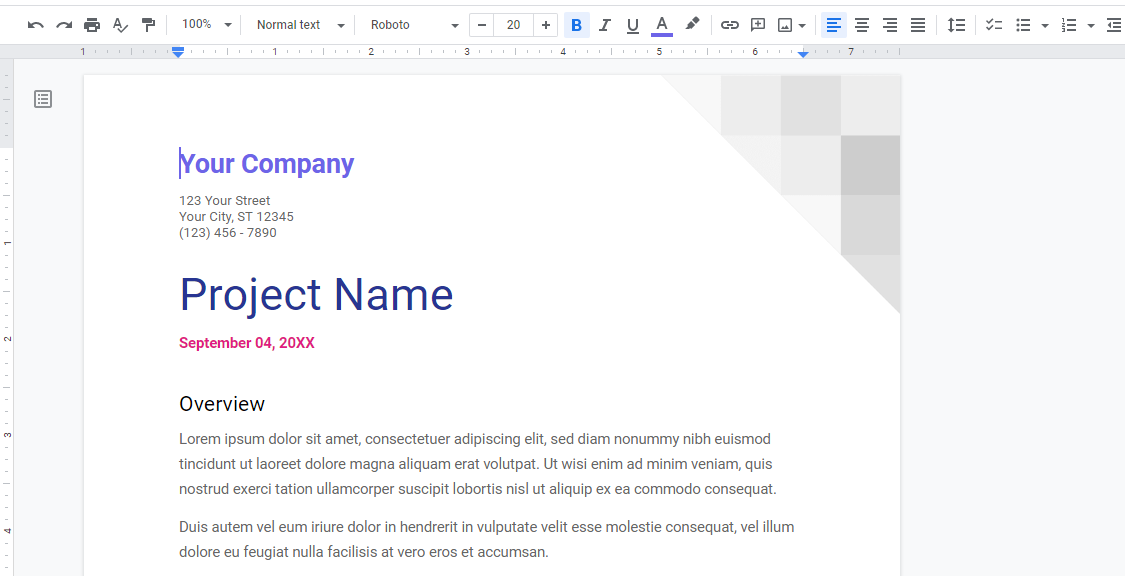
- Once you have clicked on the “ok” button, the template appears on your screen, ready for customization and editing.
Step 9: Customize the Flyer
- Save the chosen template and then edit the text on the template to replace it with the information you want in your flyer.
- By editing, you get to change things like font, background color, graphics, title, or even the colors, among other things you may consider changing with the help of the existing formatting tools.
- Click on the text to enable editing.
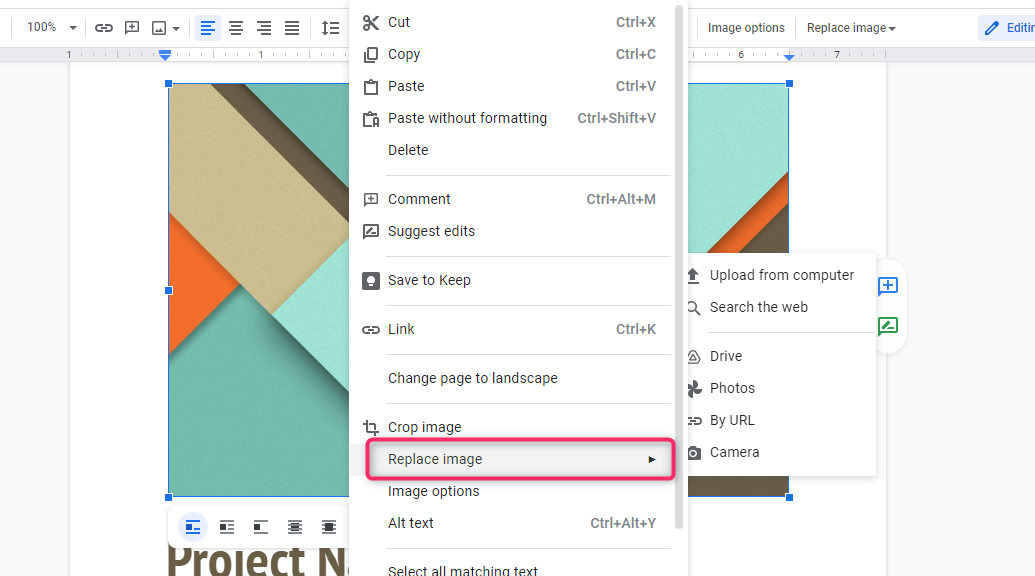
- Right-click on the image and a dropdown menu will occur and will offer an option of replacing the image with another from either google drive, your computer, or even the web.
Step 10: Preview Your flyer
Once you’re done editing your template;
- Click on the View tab on the top bar and select the “Full–Screen” option to view the flyer you have created.
- If you are satisfied with what you have, then save it and close the google docs.
How to make a flyer from scratch in Google Docs
You may choose to directly make your flyer from a blank document, which is also pretty simple. This is an alternative method where you don’t want to use someone else’s template, or rather you’re not conversant with the editing of the already existing templates. You will start by following these steps.
Step 1: Open Google Docs
- Open Google Docs. Do this by searching Google Docs on any of your search engines, and the google docs page will appear.
Step 2: Open a blank page
- Under “Start a new document tab,” click on the “+” sign. Once you click, a new blank document will appear.

Step 3: Fill in the flyer details
- Fill in your flyer details on the blank document that appears after step. You can use the toolbar to change font size, style, or images.
Your work will be saved automatically every time to stop editing work. All the work is saved directly in your Google Drive account. You need not worry. Just keep typing your work, and once you are done, you can retrieve it from your Google Drive.
Step 4: Print the Flyer
This step is optional because some may want to print their flyers right away, while others will save them for further improvements. If you want to print your flyer and you already have a printer connected, then you can do the following.
- On the upper left menu, click on the printer icon.
- On the top menu, click on “Files” and then click on “Print” on the dropdown list.

Step 5: Save the flyer
If you want to print your flyer later, you can save it on your computer. This will be done by;
- First, open your Google Drive account and find your document.
- Right-click on it. On the dropdown menu, choose “Download.”
In simple terms, it means that you can create your own event flyer in four simple steps that are; you open google docs, open the template gallery, edit the flyer, and finally create your custom flyers. As mentioned earlier, it is impossible to create a flyer from google docs if you do not have a google account.
In conclusion, you will learn that the Google Docs application has made our work easier since, with just a few steps, one may create their own flyers without spending money. The application is essential since it’s very easy to use and at the same time is responsible for the creation of high quality and high catching flyers for events and products as well. Google Docs is also used to create other things such as brochures, so one may consider creating multiple things using it.