
A list is a type of document that contains details that are arranged in a specific order. Word has proved to be one of the best editors for creating list documents. It has numerous tools and features that can be used to make a list. This post will discuss ways of creating lists using Microsoft Word.
How to make a checklist
Table of Contents
Steps:
1. Locate the Word icon on your Pc and double-click on it to open.
2. Open the document that you want to add to the checklist.
3. Place the cursor where you want to insert the checkbox.
4. Click on the Developer tab.
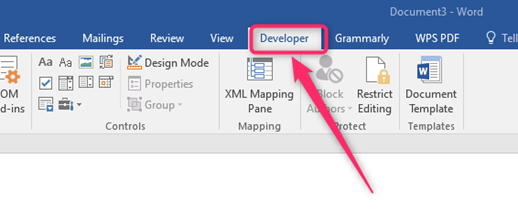
5. Locate the Controls section, and select the checkbox option.
How to change the checklist icon
Steps:
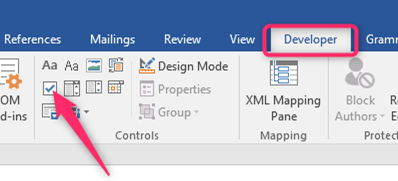
1. Click on the Developer tab.

2. Locate the Controls section, and click on the Properties button.
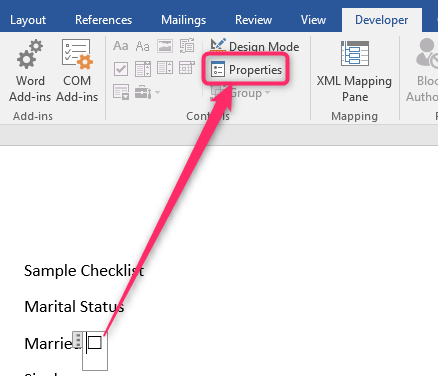
3. In the Check symbol section, click the Change button.
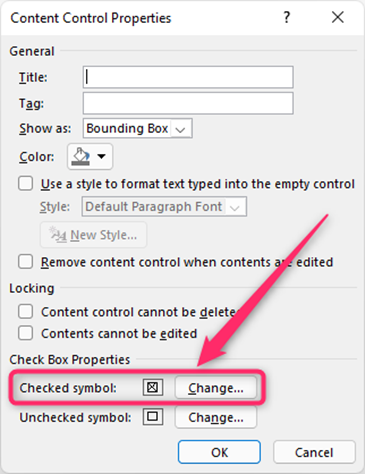
4. Choose the check symbol you want.
How to bullet points
Steps:
1. Open the word document you want to apply bullet numbering.
2. Place the cursor where you want to add the numbering (bullets).
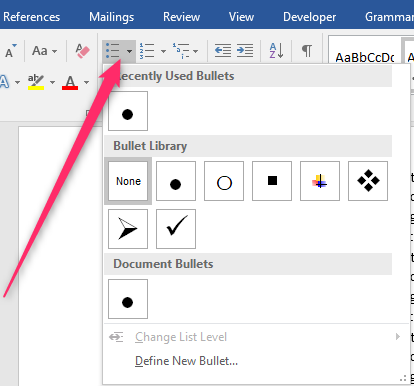
3. Locate the numbering tools in the Paragraph section. Choose the numbering style you want by clicking on it.

4. Click on the Bullet icon. To change the bullet numbering style, click the drop-down and select the format you want.
Alternatively:
1. Open the document you want to add to the bullet numbering system.
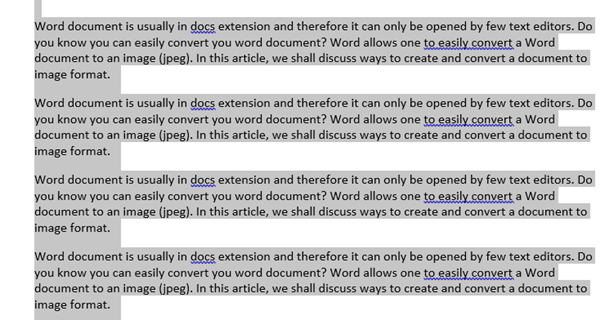
2. Select all the sections captured in the numbering system.
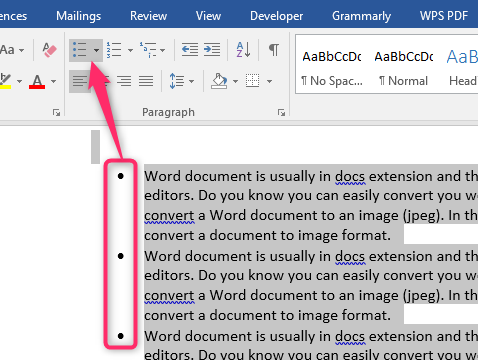
3. Click on the Bullet icon in the Paragraph section. To change the bullet numbering style, click the drop-down and select the format you want.
Customizing Bullets
Changing bullets color
Here are the steps to follow to change the color of the bullets:
1. After adding the bullets, click on them.
2. Click the Home tab. From the Font section, click on the Font Color drop-down button.
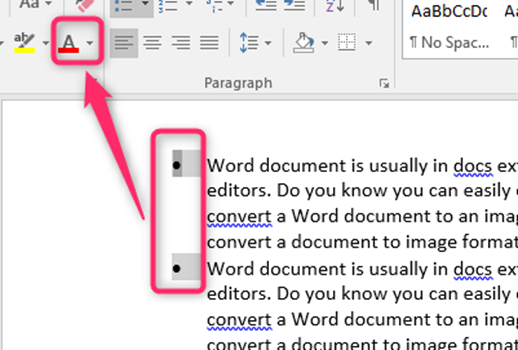
3. Choose the color you want your bullets to have.

Changing bullets size
Here are the steps to follow to change the color of the bullets:
1. After adding the bullets, click on them.
2. Click the Home tab. Click on the increase or decrease font button from the font section.

3. Alternatively, you can click on the font drop-down menu and select the font you need.
To Turn on Automatic Bulleted lists.
Steps to follow:
1. Locate the Word icon on your pc and double-click on it to open the application. On the opened document, locate the File tab on the toolbar, and click on it.

2. From the File menu, click on the Options button. Doing so will open a Word options dialogue box.

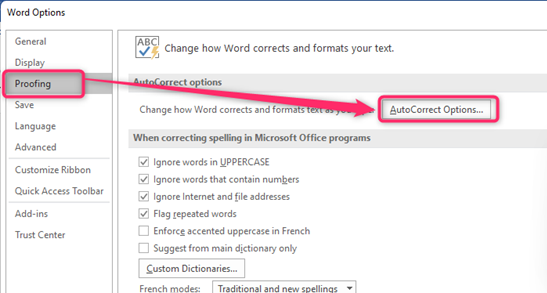
3. On the dialogue box, click on the Proofing button. Then, select the Autocorrect Options button. This will open Autocorrect dialogue box.
4. Select the AutoFormat As You Type Tab.
5. Then, locate the Apply as you type section and check the Automatic bulleted list checkbox.

To Turn off Automatic Bulleted lists
Steps:
1. Locate the Word icon on your pc; double-click on it to open the application. On the opened document, locate the File tab on the toolbar, and click on it.
2. From the File menu, click on the Options button. Doing so will open a Word options dialogue box.
3. On the dialogue box, click on the Proofing button. Then, select the Autocorrect Options button. This will open Autocorrect dialogue box.

4. Select the AutoFormat As You Type Tab.
5. Then, locate the Apply as you type section and uncheck the Automatic bulleted list checkbox.