

In Word, the Tab stop is usually used when spaced text is required. This feature allows the Excel user to use different alignments in a quicker and faster way. It also controls the carriage movement. This is due to its adjustable end stop feature. However, many people find it difficult to use this Word feature as various workarounds are involved. In this article, there are simpler and well-explained steps to use and launch Right Tab Stop.
Using the Paragraph dialogue box
Table of Contents
To set a tab stop, the paragraph dialogue box can be used. Here are the steps to be followed when using this method;
1. Open the document you’re working on.
2. Then, on the ribbon, click the “Home” tab.
3. On the Home tab, locate the paragraph section and then click the dialogue box launcher.

4. On clicking, a paragraph dialogue box is open. Locate and click the “Tabs” button.

5. A tab dialogue box opens. On the “Tab stop position,” enter the measurements.
6. Then, select the alignment of your choice from the ‘Alignment field.’ In our case, we will choose the Right option since we are setting the right tab stop.

7. From the leader section, select one if you want. Alternatively, you can select the “none” option.
8. Click the “Set” button to save changes.
9. Finally, hit the “Ok’ button, and you will have added a right tab stop on your word document.

Using Word Ruler to set a Right Tab Stop
Another method that can be used to add a Right Tab stop on your document is by using Word’s Ruler. Let’s break the whole procedure into steps which are discussed below;
1. After opening your document, you need to enable the formatting mark and check the excel ruler.
2. To enable the formatting marks to follow these steps;
- On the ribbon, click the Home tab button.
- Then, locate the paragraph section.
-
In the paragraph section, there are formatting mark symbols. Click on them.

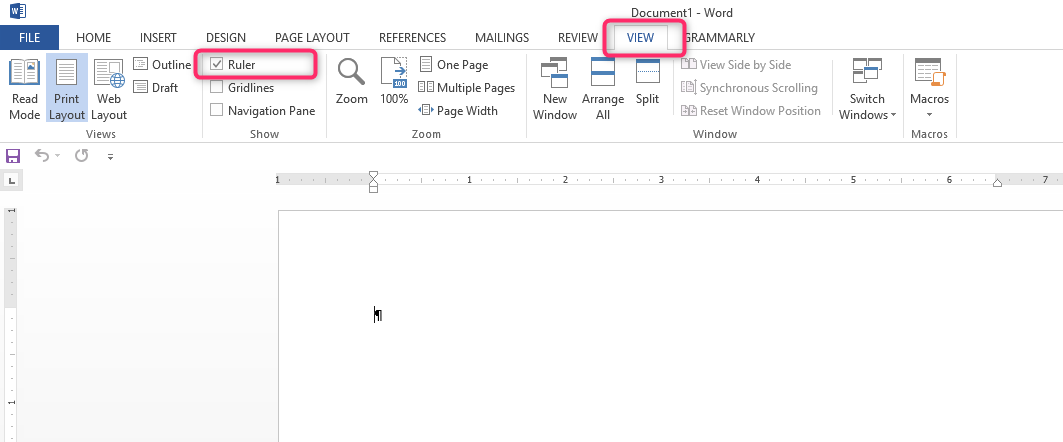
3. Then, enable the Ruler. Here are the steps to do so;
- On the ribbon, click the View tab.
- Then, locate the show/hide section.
-
In this section, check the checkbox next to Ruler.
4. At this point, your rule and formatting marks are enabled. Let now set the Right tab stop.
5. Firstly, select the text you want to align to the right. You can achieve this by highlighting the text.
6. On top of the left Ruler, there’s a button that shows various tabs. Click it to change the tab to Right Tab stop. To change the tab, simply click the displayed icon until the tab of your option is displayed.

The symbols of these tabs are shown below.

7. Then, click Ruler to set your tab. Using the cursor, click anywhere on the top Ruler to select where the tab will be placed.
8. The Right tab stop is now added, and the selected data is aligned.