Justifying text or data is important when working on a document in Google Sheets to make the work look neater and more organized. Data in the spreadsheet programs on Google Sheets would look uneven, indented, and disorganized since the cells may have various formatting styles that were applied to them. There are several ways to justify Text on Google Sheets, and this article shows you how.
To justify text is to align the text so that the whole text in the spreadsheet will start or end on the same line on both the right and left sides. You can increase the space between the words and letters to achieve this.
To justify data, no spaces are added between words or letters. The vertical alignment tool is used to position the data either to the left, the right, or the middle. Use the following steps;
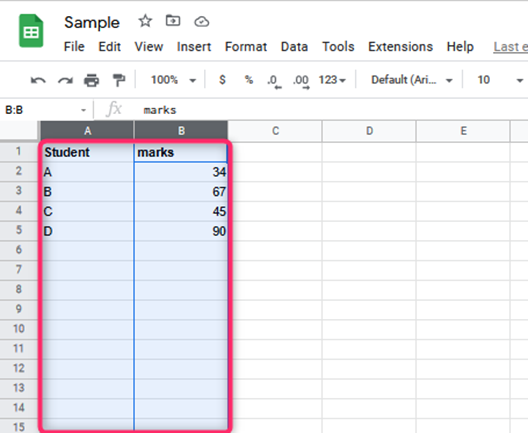
1. Select the cells in Google Sheets that you want to justify. It is done by highlighting the whole column

2. Open the Toolbar
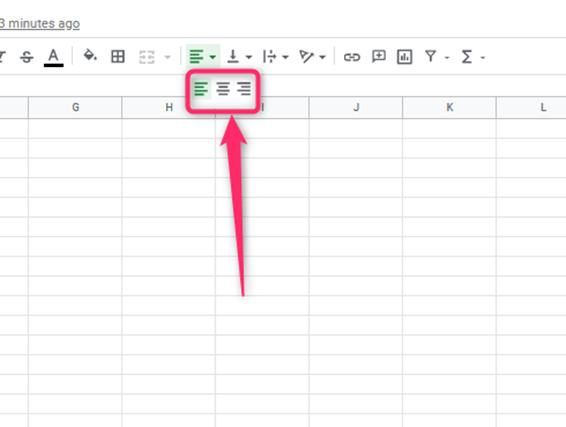
3. Choose the Horizontal alignment tool

4. Three options appear, i.e., Left, Right, or Center
5. Choose the one you want

6. The data will finally be aligned in whatever chosen manner.
To justify a single paragraph in Google Sheets, do the following;
1. Highlight the paragraph you want to justify

2. Click on the justification symbol

3. Press the button, or you can use the keyboard shortcut Ctrl+ Shift+ J.
4. Press OK
You can also use the following different ways to justify Text on Google Sheets:
1. Open the Toolbar section
2. This is used to align the text vertically

3. Highlight the texts that you want to justify

4. Open the menu command to align the texts
The following method can also be used;
1. The Menu Command aligns your text vertically
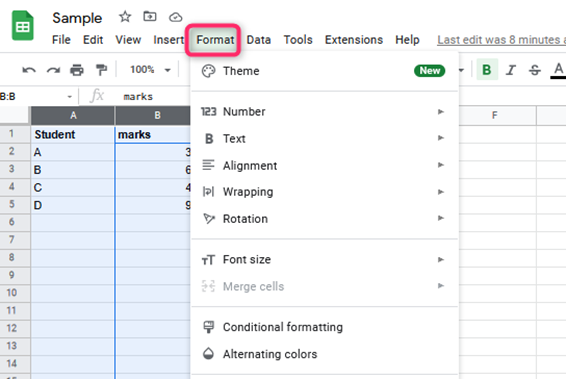
2. Open the Format menu

3. Click on whatever option you want for your text to be aligned

Rotating your Text in Google Sheets
Follow these steps
1. Open the Format menu
2. Go to Text rotation

The custom angle can also rotate the text, i.e., 30 degrees or 40 degrees. You can also format the cells to justify cells to make this easy. You can also adjust the “font-size” of the text. It can be done in the following way;
1. Highlight the “cells” that you need to modify
2. Open the Font size in the Toolbar

3. Select your desired font size

4. This will apply to the text you have selected
To change the font of the text you are justifying, do the following:
1. Highlight the “cell” you need to change the font
2. Open the toolbar
3. Go to the Format menu

4. Go to Font and choose the font size you want your text to be.

5. This changes the font size of the text.

