This tutorial explains to us exactly why it is important to view the print area before we print a spreadsheet and how to view it. Excel and Google sheets provide us with many spreadsheet formatting and control features. We can format our spreadsheet to our desired level and print it if necessary. To print our spreadsheet, we need to set the print area first and then most importantly, view the print area or areas that we have set to confirm them before printing. This helps us to print the only desired work area, avoid wasting time printing and reprinting, and also save the printing resources like printing papers. But how do we do it? The following steps will show us how to view the print area in both google sheets and excel.
In Google Sheets;
Table of Contents
1. Highlight the specific area that you want to print. Left-click on the first cell on your spreadsheet, then drag the cursor over the cells or area that you want.

2. From the Google sheets menu bar, Click the File tab. This opens more options.

3. Scroll down the File options and click on the Print option with a printer icon. This opens more options on the right of the window.

4. From the Print drop-down, you can see it is selected Current Sheet by default. But this will print the entire spreadsheet. So, to set our preferred print area, click the drop-down and choose Selected cells which have the reference of the cells that you selected.

5. Now look at the window at the center. This shows you the print area that you set.

You can print your work if you confirmed it is the one you intend to print.
In Excel;
1. Open your spreadsheet on Excel from your computer.

2. Select the cells that make up the area you want to print. You can select the cells by left-clicking on the first cell on your spreadsheet, then drag the cursor over the cells or area you want.

3. From the excel menu bar click the Page Layout tab.

4. From the options provided Look for Print Area with a printer icon from the Page setup group. Then click Set Print Area.

5. After setting the print area, click on the View tab from the menu bar.

6. From the Workbook Views group, click on Page Break Preview.

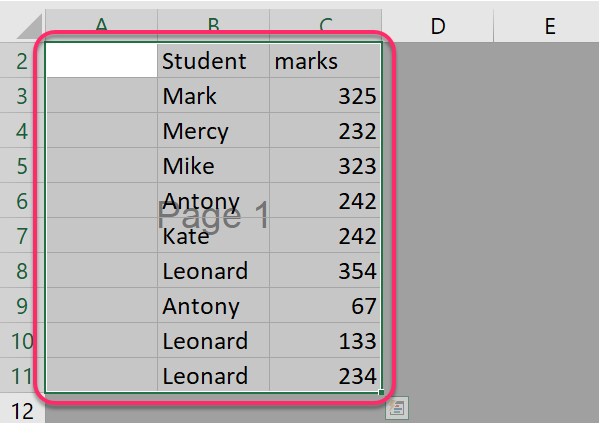
7. This will show you all the print areas you have set, marked with a green bold line border.
You can now go ahead and print or do changes to the print area if you want.