Combining multiple pictures is a photographer’s most common picture editing task. The basic process is easy but may take some practice to perfect. All you need to use are layers. They allow you to combine various pictures into one by treating various picture elements as separate objects within the same image file. Every picture is layered on top of the next one in the same space. We will provide you with the methods you can use to work with pictures in GIMP.
How to put a picture on top of another in GIMP
Table of Contents
Sometimes, you might need to put a picture on top of another in GIMP, which is an overlay. You will need to learn how to use Layer Mods and Layers in GIMP. You can put a picture on top of another in GIMP by using the following steps:
1. Open GIMP on your computer.

2. Go to File.
3. Click on Open as Layers.

4. Browse for the picture you want to overlay over the other image.
5. Click on Open.

You can repeat the steps as often as you would like until you have put as many pictures as you want on top of one another. But remember that the more layers you open, the more the Random Access Memory (RAM) you will need for GIMP to go on to run smoothly.
How to put an image behind another in GIMP
You might also need to put an image behind another one. Some techniques you try to blend the images can saturate the weak images with details from the other. GIMP enables you to put an image behind another, decrease the visibility of the top picture and make the perfect blend between the two layers. You can use the following steps:
1. Open GIMP on your computer.

2. Click on File in the toolbar.
3. Select the Open option and browse for the image you want to place behind.

4. Click on the File heading.
5. Select the Open option again to select the image you want to be above the picture being placed
 behind.
6. Click on the Edit option.
7. Select Copy option in the context menu.

8. Close the second window.
9. On the original window, click on the Edit bar.
10. Select the Paste option.

11. Click on the center of the overlay image and drag it into place.
12. Drag one of the resized handles at the image’s corners to adjust its size.
13. Click on the Pasted Layer in the Layers dock.

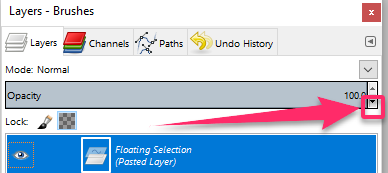
14. Click on the arrow outside the Opacity tile to lower the transparency level of the top picture.

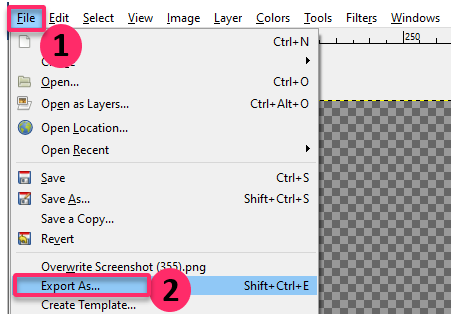
15. Go to File.
16. Click the Export As… option and choose your image as a JPEG file.

17. Click on Save to save in an original file.
Your image will now be saved, having another image behind it that is visible and not obstructed by the top image’s content.

