

Shapes are used in various fields. Shapes have proved powerful in creating designs, posters, and logos, among other designs. In this article, we shall discuss some of the uses and operations that involve shapes in Canva.
How to crop the image to shape
Table of Contents
Here are the steps to follow:
1. To get started, you need to insert the image first.
2. Locate the Upload button, and click on it. Click the image tab to select the Images already added to your Canva.

3. Alternatively, you can upload an image from your device. Click the upload media button, select the image you want to add to your design, and click the Open button.

4. Click on the add image. Click the Edit image button located on the left-top side of the page.

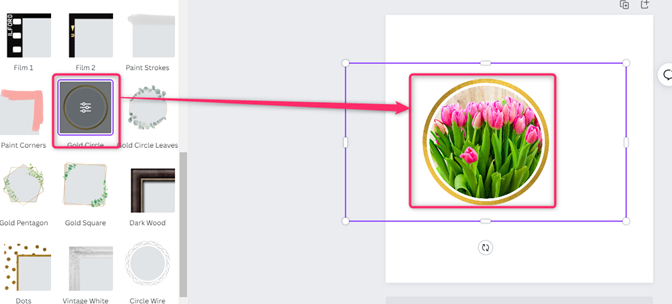
5. Locate the frame section, and then choose a shape-like frame.
6. The image will be cropped to shape.
How to flip a shape
Here are the steps to follow:
Note: There’s no direct way of flipping a shape in Canva. However, some workarounds can be used to achieve this.
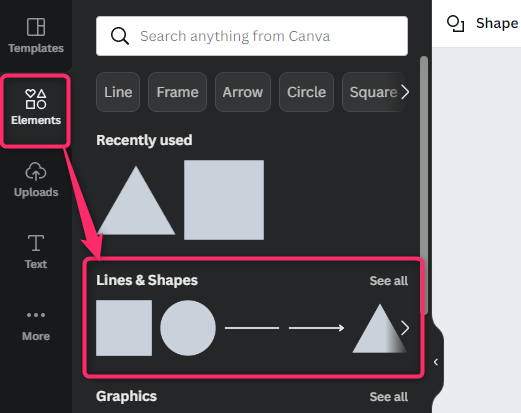
1. Click on the Elements tab, and from the Lines & shapes section, choose the shape you want to insert into the design page.

2. Next, let flip the shape.
3. To flip the shape, click on the inserted shape.
4. Then, locate the rotating shape that appears below the shape.

5. Rotate the shape 360 degrees. By doing so, the shape will be flipped.
How to insert a picture in the shape
Here are the steps to follow:
1. Click on the Elements tab, and from the Lines & shapes section, choose the shape you want to insert into the design page.
2. Resize and position the shape on your design page.

3. Locate the Upload button, and click on it. Click the image tab to select the Images already added to your Canva.

4. Alternatively, you can upload an image from your device. Click the upload media button, select the image you want to add to your design, and click the Open button.

5. Use the side handles position and resize the image to fit the selected shape.

6. That is all you need to do.
How to outline shape
Here are the steps to follow:
1. Select the page you want to add the shape by clicking on it.
2. Then, Click on the Elements tab, and from the Lines & shapes section, choose the shape you want to insert into the design page.

3. Locate the Border style button.

4. Click on it, and select the border outline you need.
How to put an image in a shape
Steps:
1. Click on the Elements tab, and from the Lines & shapes section, choose the shape you want to insert into the design page.

2. Resize and position the shape on your design page.
3. Locate the Upload button, and click on it. Click the image tab to select the Images already added to your Canva.
4. Alternatively, you can upload an image from your device. Click the upload media button, select the image you want to add to your design, and click the Open button.
5. Use the side handles position and resize the image to fit the selected shape.

6. That is all you need to do.