Gridlines are essential when formatting and aligning objects and shapes in Word documents. They give the Word user visual cues when formatting the documents. Since the lines run from the left to right side of the document and from top to bottom, the user can easily plan and manage the document. However, in default, gridlines are deactivated. To use them, you have to enable them. In this article, we shall discuss adding and using Gridlines in Word.
Using the View tab to add the Gridlines
Table of Contents
The simplest way to access and add the gridlines in your document is by using the view tab. Follow these steps to achieve this:
1. To get started, locate the Word application on your Pc. Double-click on it to open the application. To create a new document, click the File button on the toolbar. Then, locate the New button.
You can also use the keyboard shortcuts to open a new document. That is, CTRL + N. Alternatively, open an existing document that you need to add the gridlines.
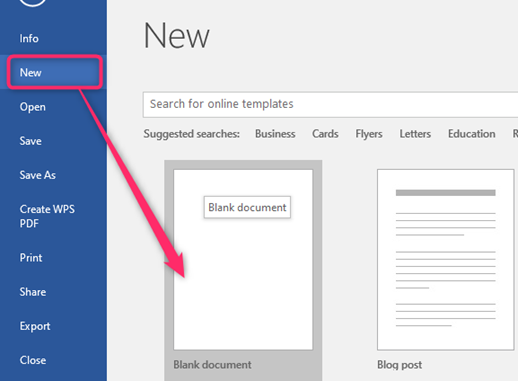
2. On the opened document, locate the View tab on the toolbar and click on it.
3. Locate the Show section, still in this pane.

4. Locate the Gridlines, and check the checkbox next to it.
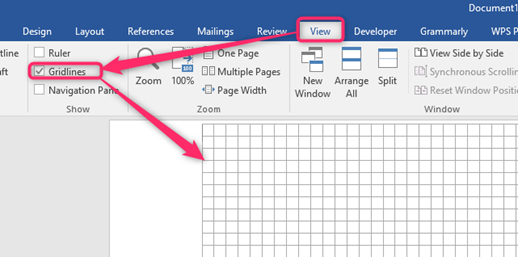
5. That is all. The document will be filled with gridlines
To remove gridlines in this method
Steps to follow:
1. To get started, locate the Word application on your Pc.
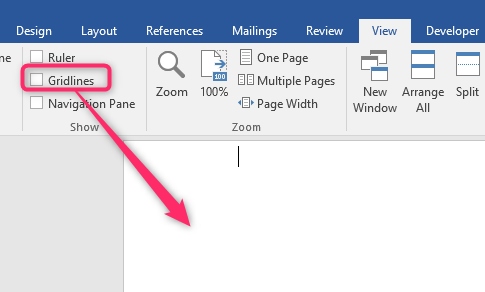
2. On the opened document, locate the View tab on the toolbar and click on it.
3. Locate the Show section, still in this pane. Locate the Gridlines, and Uncheck the Checkbox next to it.
Using the Layout Tab to add Gridlines
Steps to follow:
1. To get started, locate the Word application on your Pc. Double-click on it to open the application. To create a new document, click the File button on the toolbar. Then, locate the New button.
You can also use the keyboard shortcuts to open a new document. That is, CTRL + N. Alternatively, open an existing document that you need to add the gridlines.
2. On the opened document, locate the layout tab on the toolbar and click on it.
3. Locate the Arrange section, still in this pane.

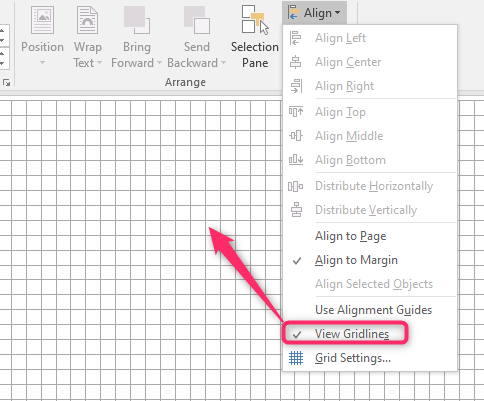
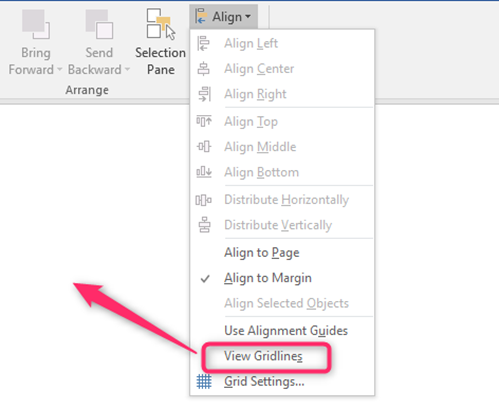
4. Click on the Align drop-down button.

5. Finally, click the View Gridlines button. This will check this button.
To remove gridlines in this method
Steps to follow:
1. locate the layout tab on the toolbar, and click on it.
3. Locate the Arrange section, still in this pane.
4. Click on the Align drop-down button.

5. Finally, click the View Gridlines button to uncheck it.
Using the Grid Settings to add Gridlines
Steps:
1. To get started, locate the Word application on your Pc. Double-click on it to open the application. To create a new document, click the File button on the toolbar. Then, locate the New button.
You can also use the keyboard shortcuts to open a new document.
2. On the opened document, locate the layout tab on the toolbar and click on it.
3. Locate the Arrange section, still in this pane.

4. Click on the Align drop-down button.
5. Click on the Grid Setting button.
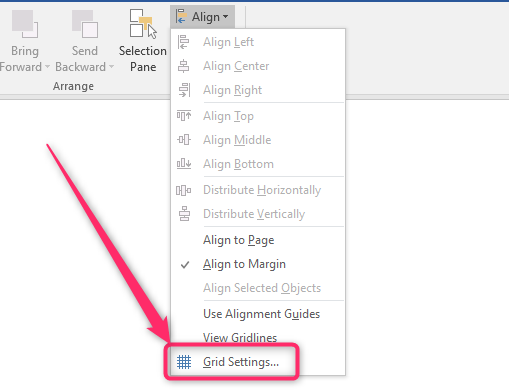
6. Finally, check the Display Gridlines on the screen button next to the checkbox.


