You can add Watermark to your Word Document to prevent other users from taking credit for your work. In this article, we shall discuss ways of creating watermarks in Word.
To add a draft watermark
Table of Contents
A draft watermark indicates that the document is a draft and is not the final copy. Here are the steps to create such a Watermark:
1. Open your Word document.
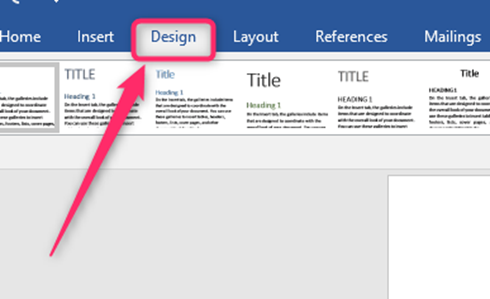
2. On the Toolbar, click on the Design tab.

3. Select the Watermark button. Click on the DRAFT watermark if it is available.

4. If the DRAFT watermark is not on the list of pre-configured watermarks, use the custom watermark button to create it.
That is:
5. Select Text Watermark and type DRAFT on text.

6. You can use the diagonal or horizontal layout according to your preferred layout.
7. Press OK or APPLY.
To add a confidential watermark
Steps to follow while creating a confidential watermark:
1. Open your Word document.
2. On the Toolbar, click on the Design tab. Select the Watermark button.

3. You can choose between CONFIDENTIAL 1 or CONFIDENTIAL according to the design that will suit your needs.

Alternatively, after selecting Watermark, click on Custom watermark.
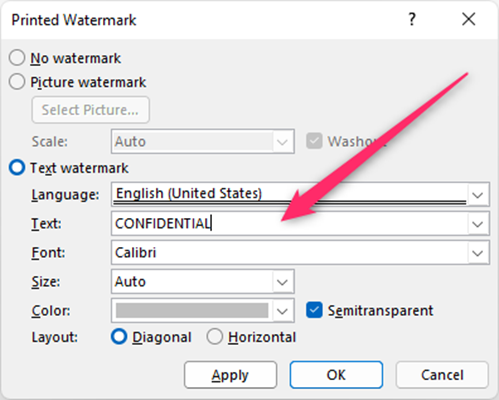
4. Select Text Watermark and type CONFIDENTIAL on text.

5. You can use the diagonal or horizontal layout according to your preferred layout.
6. Press OK or APPLY.
To add a custom text watermark
Steps to follow:
1. On the Toolbar, click on the Design tab. Select the Watermark button.
2. Click on the Custom watermark.

3. Click on the Text watermark box on the Printed watermark section. This allows you to write on the text boxes below any custom watermark you want.
4. Under Language, select the Language you want to use. English (United States) is the default language chosen.
5. On the text box right of the Text option, type the text watermark you want to insert into your document.
6. Under Font, click on the drop-down menu on the rightmost of the text box and select the Font you prefer for your Watermark. The default-selected Font is Calibri.

7. Under the Size tab, select the font size you prefer for the Watermark. The default font size Is “Auto.” This means that the font size automatically sets itself depending on the number of letters you type to fit nicely on the page of the document. However, you can click on the drop-down icon and select a preferred font from the fonts on the drop-down menu.
8. Select the layout of the Watermark that you prefer. There are two options, horizontal or diagonal layout. The diagonal layout is the default layout. You can select the desired format by clicking on the check boxes with the layout’s name.
9. Click OK.
To add Picture as the Watermark
Here are the steps to follow when using the Picture as the Watermark:
1. On the Toolbar, click on the Design tab. Select the Watermark button.
2. Click on the Custom watermark.

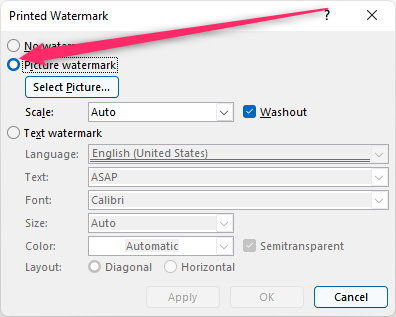
3. On the Printed watermark section, toggle on the Picture watermark.

4. Click on the Select button

5. Select the image you want to use as the Watermark.

