

Most word users have their preferred font. What may be preferred by one person may not be preferred by someone else. Different institutions, work, or schools may prefer people to use a specific font in their official documents. It may be difficult when you are unaware of the permanent steps to make these changes.
Microsoft word usually sets Calibri as the default font of any new word document. Sometimes, it may be what you do not like or prefer for your documents. Luckily enough, you can easily change the default font settings to your preferred choice so that it applies to all future documents.
Steps to take when changing the font to Times New Roman
Table of Contents
1. Open your new or an existing word document.
2. On the main menu ribbon, click on the Home tab and locate the Font group.

3. On the Font group, click on the Font Dialog Box Launcher (the small arrow at the lower right corner) to display a dialog box.

4. In the Font dialog box, choose the font style and size you prefer for your word document. In our case, you will select Times New Roman from the given options.
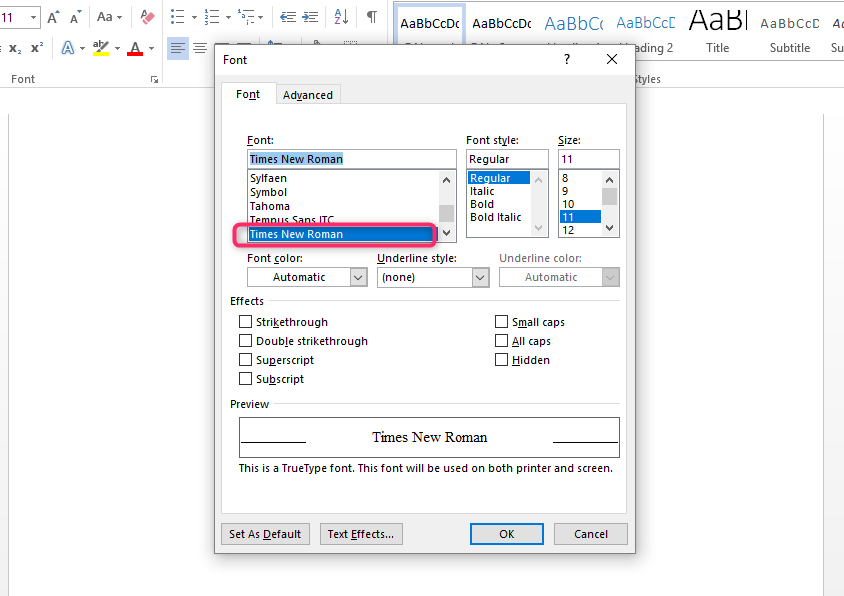
5. Click on the Set As Default option.

6. Next, select one option: This document only or All documents based on the Normal template option.

7. Here, you will; select the option All documents based on the Normal template.
8. Lastly, click the OK button twice to save and apply the changes. If you close your word document and reopen it, Times New Roman should be your default font that will apply to all future documents.
What if the default changes have not been saved?
So, you have followed and applied all the above-mentioned steps only to realize that the next time you open your word document, the default is not what you previously saved and reverted to the original font. You may be wondering what exactly happened.
So, it may be due to permission settings or some add-ins interfering with your changes. To stop your font from reverting to the original one, here is what to do; check your permissions setting or turn off add-ins.
Note;
Sometimes you may be restricted from having to Write permission. If this is the case, you will have to contact the administrator of your company’s computer to assist you.
How to Turn off add-ins
1. Open your word document and click on the File tab > Options > Add-ins

2. In the Add-Ins box, find the specific one you want to turn off listed in the Type column.
3. Select your add-in in the Manage list and click Go.
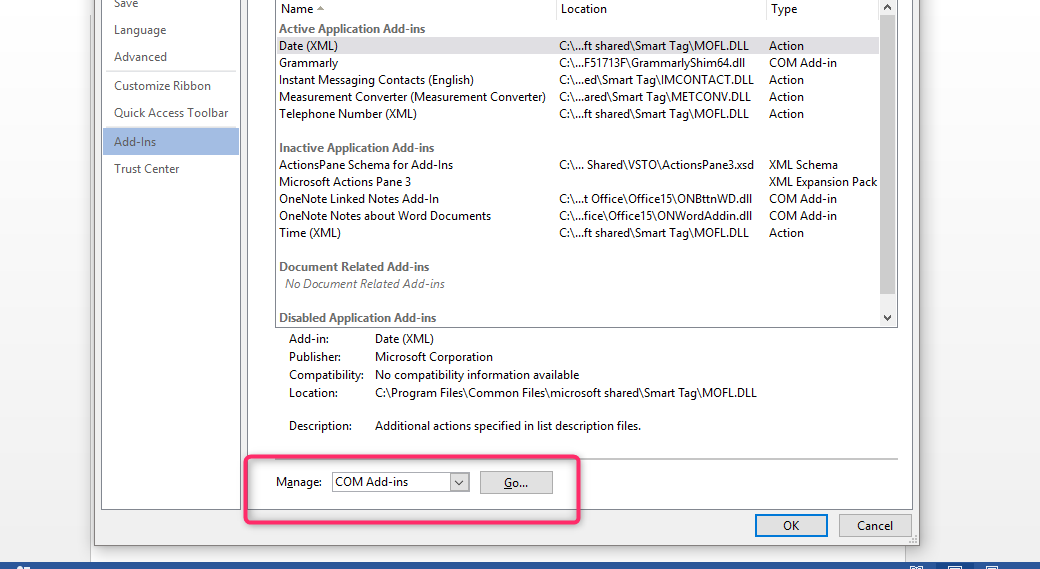
4. Uncheck all the boxes for the Add-Ins you want to turn off and select OK. Afterward, repeat all the above steps for any other add-ins.