In official and non-official documents, users and recipient(s) may be required to sign. Ms. Word makes this possible as it allows the creation of editable signature line(s). Thankfully, Ms. Word has many in-built functionalities that differentiate a signature line from a normal line. This gives the signature line a professional touch. This article will discuss how to create signature lines in Word.
To add a single Signature line
Table of Contents
To understand how to add multiple signature lines, one should know to add a single signature line. These are the steps to add a single signature line in Signature in Word:
1. To get started, locate the Word application on your Pc. Double-click on it to open the application. To create a new document, click the File button on the toolbar. Then, locate the New button.
You can also use the keyboard shortcuts to open a new document. That is, CTRL + N. Alternatively, open an existing document that you need to add the Signature line.

2. Click where you want to add the signature line.
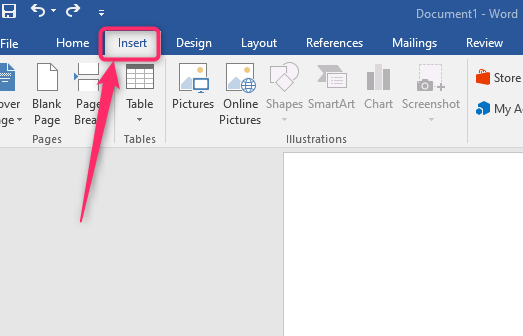
3. On the opened document, locate the Insert button on the toolbar.

4. On the right-hand side of the toolbar, click the Signature line button.

5. A Signature setup dialogue box opens. Fill in the boxes as described below;

Suggested Signer- Here, you must enter the name of the user or person who will sign the document.
Signer’s position- In this space, you are required to enter the position or rank of the person who will sign the document.
Signer’s Email address – You are required to enter the email. If you do not know the signer’s email, you can leave this section blank.
Instruction for the signatory- In this space, you can add the instructions that will guide the signer.
Allow the signer to add comments in the Sign dialogue- This checkbox controls the signer’s comment box. If the checkbox is checked, the signer is allowed to comment, which is the opposite.
Show date in the Signature line- This checkbox controls the date’s appearance in the signature line.
To add multiple signatures lines
Steps to follow:
1. To get started, locate the Word application on your Pc. Double-click on it to open the application.
2. Click where you want to add the signature line.
3. On the opened document, locate the Insert button on the toolbar.

4. On the right-hand side of the toolbar, click the Signature line button.

5. A Signature setup dialogue box opens.
6. Repeat step (2), step (3), step (4), and step (5) to add another signature line to your document.
How to Add a Signature in the signature Line
Steps to follow when adding a signature in the signature line:
1. Double-click on the Signature line in your document.
2. Click the Select image button on the Sign dialogue box. Choose the image that contains your sign from your device.

3. Click the Change button on the Signing as section
and add your name.
4. Finally, hit the Sign button.


