

A note-taking program is called OneNote. You can organize your notes into several notebooks, as well as specific parts within notebooks, and it serves as a central location for all of them. Microsoft OneNote is a well-known note-taking application that enables users to create their notes and arrange them across many notebooks and discrete sections inside those notebooks. I realized my Microsoft OneNote application’s default language setting is English while using Microsoft Notebook (United States). On occasion, you could want to write the essay with a specific audience in mind, like English speakers (UK). When you write the word kilometer in OneNote, a red underline appears beneath it. If this is the situation, you have found the right article and want to change the language used in a OneNote section. You can change the wording of a OneNote section or page by following the steps we will show you how to take.
You can change language in OneNote by using the following steps:
1. Open OneNote on your computer.

2. Select the word or sentence that you want to change the language.
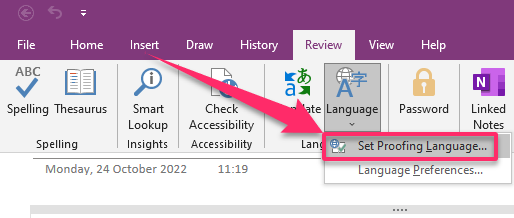
3. Go to Review.

4. Click on Language.

5. Click on Set Proofing Language to English (United Kingdom) or any other language of your choice.
You will now remove your red underline, and you can feel that everything is now in order. The default language will be utilized as the proofreading language after you go on to the next stage and begin creating fresh content. It will once more notify you of a spelling error. Once more, you must choose those written words and complete step 3 of the procedure. However, there are occasions when you decide to alter the language of the entire page as opposed to a specific section. With the techniques mentioned above, you can change the language of the whole page from English (United States) to English (UK) by selecting the article for the entire page and setting the Proofing Language to English (UK). This ought should operate without a hitch. In this manner, Microsoft OneNote’s language has been effectively modified. However, if that does not work, you can try the next option. With the steps below, spelling mistakes can be concealed. Go to Setting > Proofing > Hiding spelling mistakes. You should then be all set! However, you should only do it if the language setting change does not work. All the best!