Before starting a project, use a thorough preparation checklist to ensure you don’t skip any essential steps. Some of the most significant elements on documents, Web pages, and forms are checklists with checkboxes. Using OneNote to manage your information, you may make checklists by adding action items to any page. Create straightforward checklists or use OneNote’s formatting capabilities to give them a more polished appearance. In addition, you can look for to-do list templates to add to your OneNote notebook. Utilize a thorough project preparation checklist to ensure you do not miss any crucial stages. Checkboxes and checklists are some of the most critical components of forms, web pages, and papers. When managing your information in OneNote, you may create lists by adding action items to any page. You can make simple checklists or format them with OneNote’s formatting tools for a more professional look. To add to your OneNote notebook, you might seek to-do list templates. We will provide you with the steps you can use to make a checklist in OneNote.
You can make a checklist in OneNote by using the following steps:
1. Open OneNote on your computer.

2. Type text on a OneNote page to take notes.
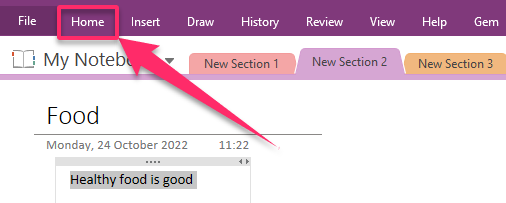
3. Select the text you want to make a checklist of.

4. Click on the Home tab.

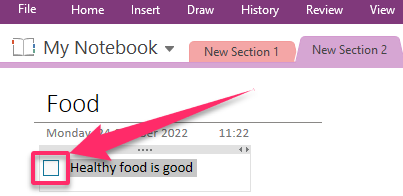
5. Click To Do Tag.

6. Each selected item will now have a checkbox next to it.

7. Go to the Home tab.

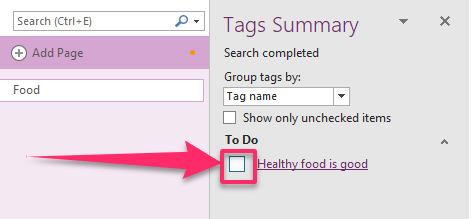
8. Click Find Tags to find all tags.

9. Click the box next to each tag to show that you are done as you complete the items.

That is how you make a checklist using OneNote. They are easy steps to follow, even for a beginner. For making To-Do lists, checklists are fantastic. The tag that is used to make a checkbox on an item on a page can be searched for, or they can be created instantly. Make your list first, then turn it into a list with checkboxes to make a straightforward checklist on the page. Those are the things that you need to keep in mind.

