

Both Google Sheets and Excel files can be printed. If you want to leave out columns or rows, we may print the whole workbook, which contains one or several spreadsheets, print a single sheet, or print just some part of the spreadsheet. Printing a certain part of Excel or Google Sheets requires setting the print area before printing. Setting the print area in google sheets and excel Sheets is explained in the steps below.
In Google Sheets;
Table of Contents
1. Highlight the specific area that you want to print. Hold the SHIFT button and use the down, up, left, and right arrows to choose the cells.

2. On the Google Sheets menu bar, click the File tab. This opens more options.
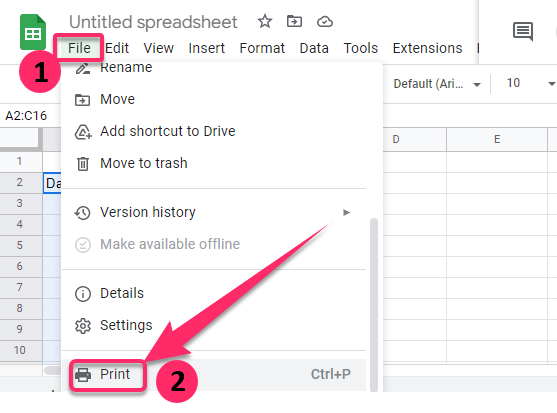
3. click on the Print option. This opens more options on the right of the window.

4. Click the drop-down and choose Selected cells, which have the reference of the cells that you selected. The windows at the center only display your selected cells.

Your print area is set, and you are ready to print your work.
In Excel;
1. Open your spreadsheet on Excel from your computer.

2. Select the cells that make up the area you want to print. You can select the cells by left-clicking on the first cell on your spreadsheet, then drag the cursor over the cells or area you want.

3. From the excel menu bar, click the Page Layout tab.

4. From the options provided, Look for Print Area with a printer icon from the Page Setup group. Then click Set Print Area.

We can add adjacent cells to the print area we set. If you want to add adjacent cells, highlight the adjacent cells. Then click Page Layout > Print Area > Add print Area. Your new print area will now be set.