A pixmap or group of pixmaps used for painting is called a brush. GIMP comes with a collection of 10 Paint tools that can be used to execute tasks other than those you would typically associate with painting, like erasing, copying, smudging, lightening, and darkening. Except for the ink tool, all paint tools use the same set of brushes. Applying custom brushes in GIMP is one of its most fascinating features. Your drawing and editing tools might function differently thanks to custom brushes, adding additional texture, style, and other features. To fully unleash your creative vision, you can even make your brushes. We will provide you with the methods you can use when working with brushes in GIMP.
How to create a new brush in GIMP
Table of Contents
In GIMP, there are already brushes that have been created. But you can also create a new brush using the Create a new brush button at the bottom of the brush selection dialog. You can also right-click and select New Brush. Complicated black and white brushes can be made by saving a grayscale image using the .gbr file extension. You can create a new brush in GIMP by using the following steps:
1. Open GIMP on your computer.
2. Create a new image that is the size of the brush you will create with a transparent background.
3. Go to Layers dialog.
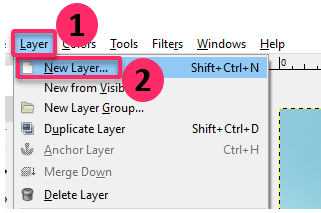
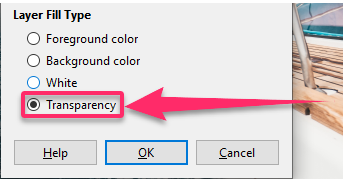
4. Create additional layers using the fill type Transparent.
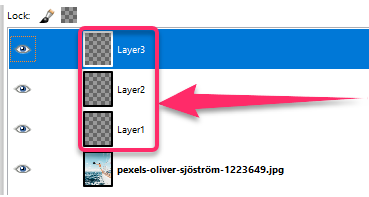
5. Give the layers any name you want—for instance, Layer 1, Layer 2, and Layer 3.
6. Draw the images you want in the layers you have already created.
7. Export your brush as a GIMP picture brush by clicking on the image and selecting File.
8. Click on Export As…
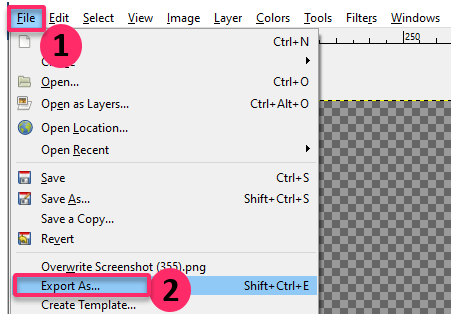
9. Save the image in the brushes folder to be able to use your new brush.
Note that for this type of brush, you should save them with a .gih extension.
How to use a paintbrush in GIMP
You can use the Paintbrush tool in GIMP to create blurry strokes of existing images. The currently selected brush is used to render each stroke. You can use a paintbrush in GIMP by using the following steps:
1. Open the GIMP application on your computer.
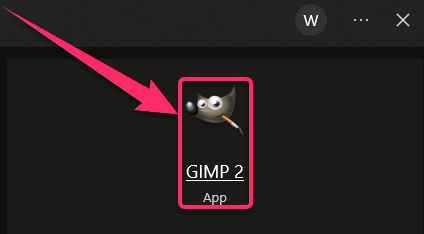
2. Go to File.
3. Select Open or New to open a file or create a canvas.

4. Click on Tools in the program menu.
5. Hover your cursor over the Paint Tools.
6. Click on Paintbrush.
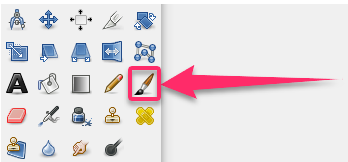
7. Click on the Color box.
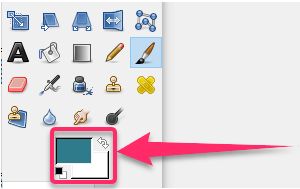
8. Select the color for your paintbrush by adjusting the gradient sliders.

9. Change the Paintbrush options to customize your brush.
10. The options are in the lower half of the GIMP toolbox.
11. The Opacity Slider determines the opacity of the brush.
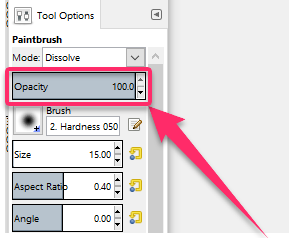
12. Click on the icon that is next to Brush.
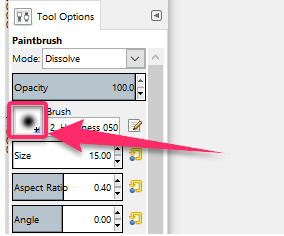
13. Select the shape for the brush from the menu that appears to change the painted shape on the canvas.

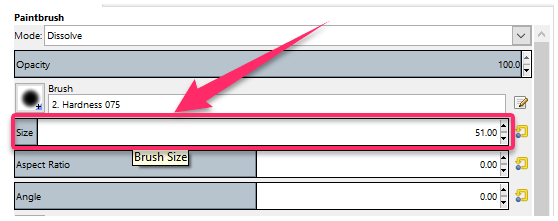
14. The Scale slider is used to alter the size of the brush.
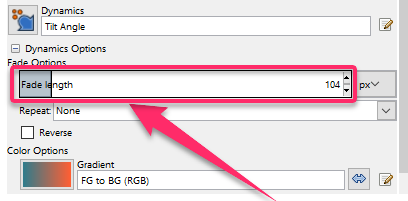
15. Click on the Fade Out box to make every brush stroke fade.
16. Click on Apply jitter box to alter the stroke from a continuous to a broken line.

You can now use a paintbrush in GIMP for your images.
How to install brushes in GIMP
Finding brushes in GIMP is a very simple process. Sometimes you may want to install brushes instead of using the ones already provided in GIMP or creating new ones. You can install brushes in GIMP by using the following steps:
1. Open GIMP on your computer.
2. Go to the Edit menu.
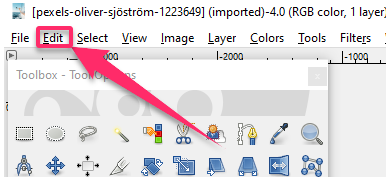
3.
Select Preferences.

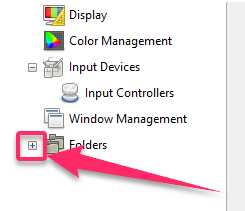
4. Expand the Folders category by clicking on the small ‘+” sign in the left pane of the Preferences window if it had not been opened already.
5. Select Brushes.
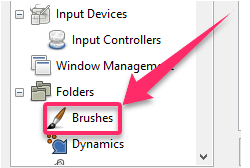
6. The right pane updates with your brush folders.
7. One of the folders is the system directory, and the other is the personal directory that is highlighted as Writable next to it.
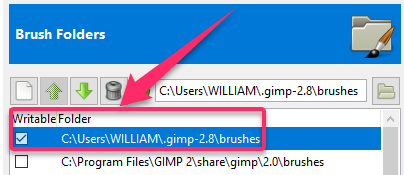
8. Select the Writable folder.
9. Click on Show file location in file manager, which is the small file drawer icon in the upper right.
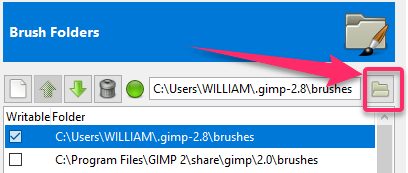
10. A new window opens showing the Brushes folder.
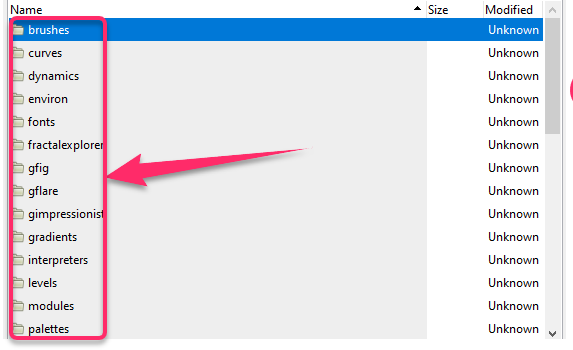
11. Copy the new brush file into the Brushes folder and return to your GIMP window.
12. Click on the Refresh brushes button in the Brushes palette.
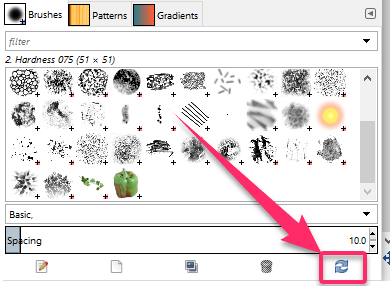
Your new brushes should now be installed in your GIMP. This is the quick version of how to go about the installation.

