Fonts are vital elements in Microsoft Word. They determine how the texts are displayed in the document. Word has numerous in-built text that can be used in the document. This post will discuss workarounds related to fonts in Word.
How to change Default font
Table of Contents
a) Using Dialogue Launcher
Here are the steps to do so:
1. Locate the Word application on your Pc. Double-click on it to open the application.
2. Locate the Home tab on the toolbar on the opened document.

3. Click on the font dialogue box launcher in the Font section.

4. Click on the Font tab. Navigate to the Font style, Size type, and Effects section, and make changes in these sections.

5. Next, click on the OK button.
b) Using the font section
Steps:
1. Locate the Word application on your Pc. Double-click on it to open the application.
2. Locate the Home tab on the toolbar on the opened document.

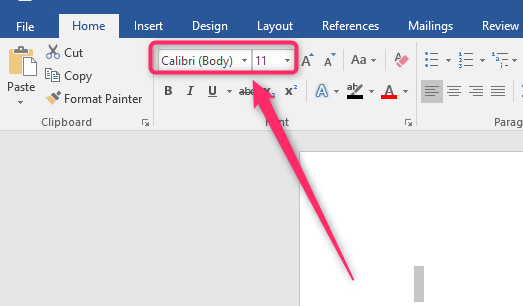
3. Locate the Font section in the Home tab.
4. Click the font drop-down button, and choose the font you want to apply to your document.
c) Using the Right-click feature
Steps:
1. Locate the Word application on your Pc. Double-click on it to open the application.
2. Press the CTRL + O keys to open the existing document you want to change the fonts.
3. Highlight the section you want to alter.
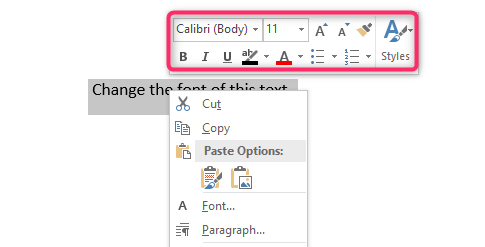
4. Right-click and choose the font style and size you want.
How to set a Default font
Default settings are the standard setting of Word. Did you know you can easily set the default settings of fonts in Word? Here are the steps to set default fonts in Word:
1. To get started, locate the Word application on your Pc. Double-click on it to open the application.
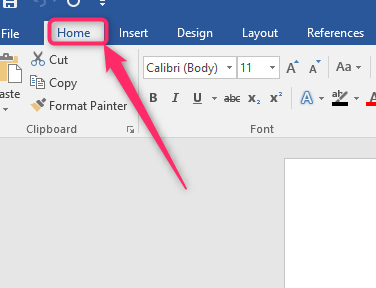
2. Locate the Home tab on the toolbar on the opened document.
3. Click on the font dialogue box launcher in the Font section.

4. Click on the Font tab. Navigate to the Font style, Size type, and Effects section, and make changes in these sections.

5. Next, click on the Set As Default button. Choose where the default setting should apply.
6. Finally, click the Ok button.
Changing the character spacing default setting
Changing the default character spacing settings means altering the kern, scale, position, and spacing settings. Here are the steps to follow:
1. To get started, locate the Word application on your Pc. Double-click on it to open the application.
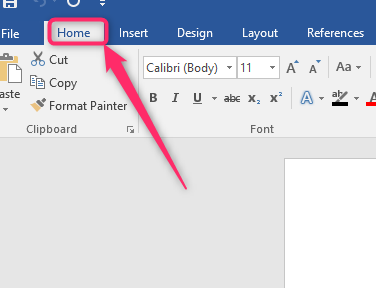
2. Locate the Home tab on the toolbar on the opened document.
3. Click on the font dialogue box launcher in the Font section.

4. Click on the advanced tab. Navigate to the Character spacing section and Opentype Feature section and make changes in these sections.
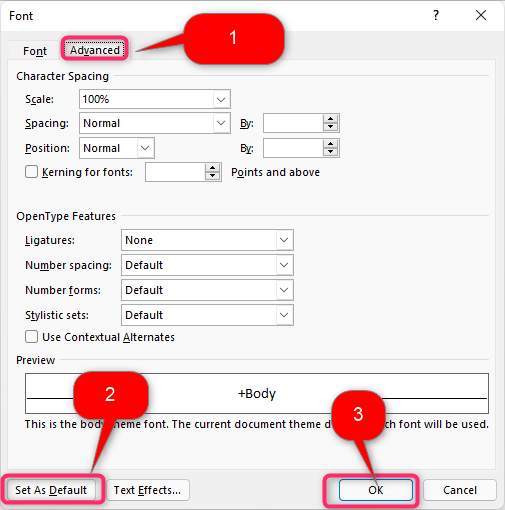
5. Next, click on the Set as Default button. Choose where the default setting should apply.
6. Finally, click the Ok button.
Changing the default margins
Here are the steps to follow:
1. To get started, locate the Word application on your Pc. Double-click on it to open the application.
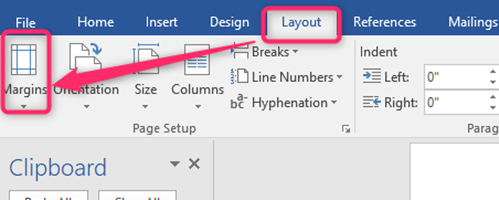
2. Locate the Layout tab on the toolbar on the opened document.
3. Click the Margins drop-down button and select the Custom margins button.
4. Make changes in the Margin tab in the Page Setup box.

5. Next, click on the Set as Default button. Choose where the default setting should apply.
6. Finally, click the Ok button.

