

These blank spaces line the right, left, top, and bottom sides of a document. They help in making a document look neat and professional hence making them so vital.
Schools and workplaces have specific requirements for documents that one creates, and one of them involves margins. What makes it likely for one to be required to know how to set 1-inch margins in Word is the fact that Microsoft word is still among the most used means of creating text documents. The use of these margins helps regulate the paper size by maintaining the paper size and preventing those who try to make small changes and inflate the size artificially.
Steps to add 1 inch Margins in Word
Table of Contents
You can alter the size of your margins any time whenever the document is open. This change can be applied to every page of your document, so there is no worrying about manually adjusting the margins of your many paged papers. The following guide provides a sequential approach on how to do it.
1. Open Microsoft word, or double click on the existing document to open it with MS
2. Click the page layout tab on top of the window
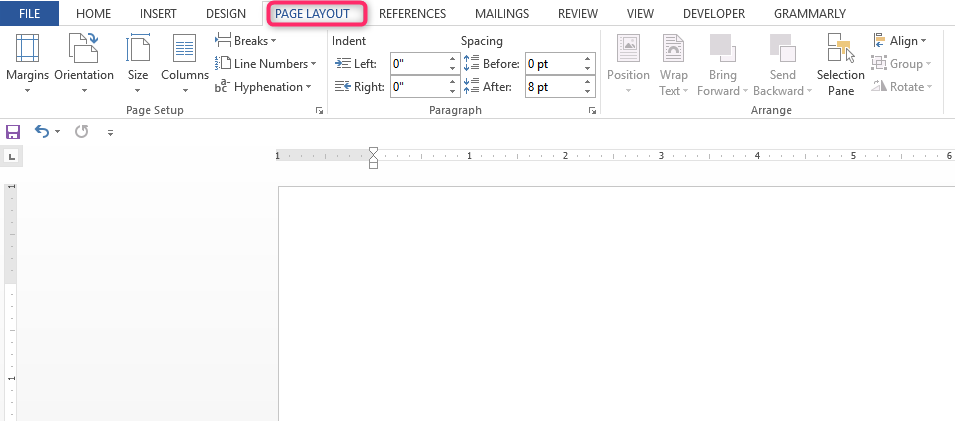
3. Click margins on the setup section of the window, and then click the normal option.

Document margins can also be changed by adjusting ruler guides on the document at the top left corner.
How to set a default 1-inch margin in Microsoft word
This is useful if every document you create in Word requires a 1-inch margin. You need to set the margin as your default page margin for every new document created.
1. click on the page layout tab on top of the window
2. Click on the margins button. Then custom margins at the bottom of the list

3. Check and confirm that the currently selected setting is the margin settings that you wish to apply as defaults the at the bottom of the window, click the Set As button.
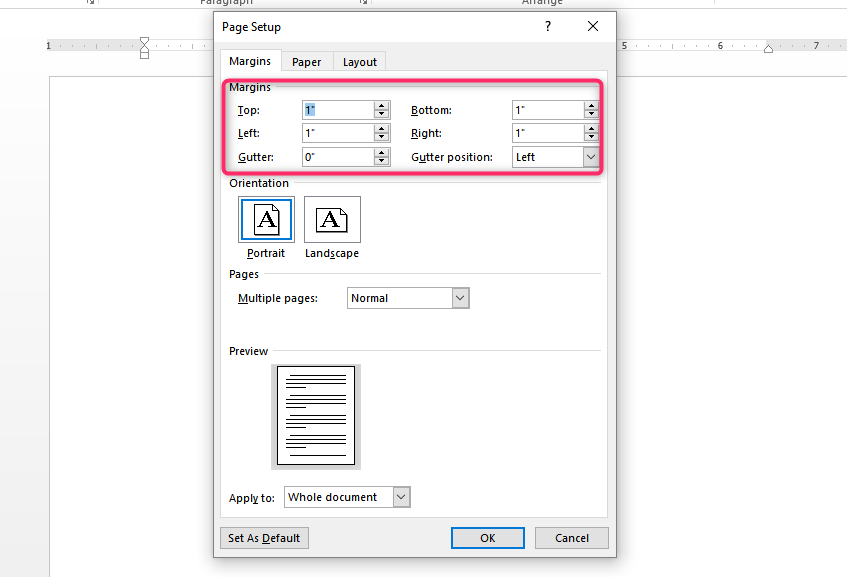
4. Click the yes button to change the default settings.

For each document that you will create that uses a normal template, this setting will be applied. However, existing documents or documents that you will receive from others will not use your default settings.
Another Shortcut to changing your margin
Drag to change your margins
Use the mouse to view changes in real-time instead of adjusting margins from the page layout menu. First, click “View” and put a checkmark in the “Ruler” check box if non s there. This is to view horizontal and vertical rulers. Find the shaded area on the horizontal left side of the ruler, and the area represents the left margin. Click, then drag the border of the shaded area to change your horizontal margin to your desired taste of setting. Repeat the same steps using the vertical ruler to change your vertical margin.