The header is a part of the worksheet that appears at the top of the Sheet. The footer is the part that appears at the bottom of the worksheet. This post will discuss some of the ways of adding and viewing Headers and footers in your Excel and Google Sheets document.
How to View Header and Footer in Google Sheets
Table of Contents
a) To view headers and footers
Here are the steps to follow:
1. Visit the Google account and log in using your email detail (That is, https://www.google.com/account). From the Google Apps, click on the Sheets icon and select the existing Sheet.
2. Click on the File tab on the menu.

3. From the menu, choose the Print button. Alternatively, press the CTRL + P keys on your keyboard.
4. Click on the More Settings button. Scroll downwards to the Options button.
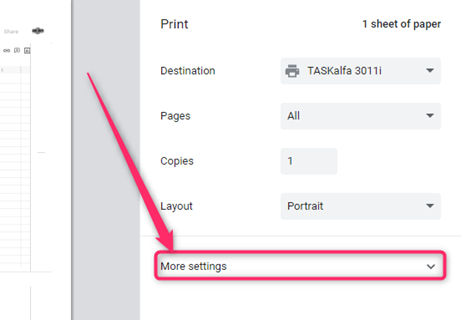
5. To view the header and footer, check the Headers and Footers checkbox.

b) To add Headers and footers
Steps:
1. Open the document that you want to add the header and the footer.
2. Locate the top row and add the header of your document.
Note: you can use the merging tool to merge two or more cells.

3. Locate the bottom-most row of your document, and add the footer.
4. Highlight the header and click on the View tab on the toolbar.
5. Hover the cursor over the Freeze button and select the row containing your header.
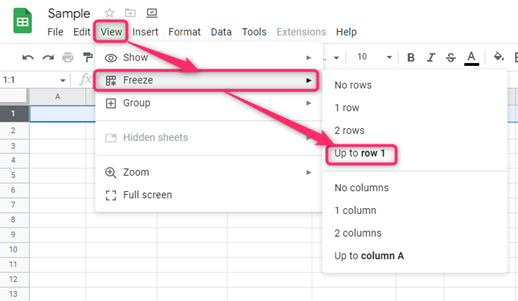
6. Repeat step (5) above and freeze the footer of your document.
NOTE:
You can use the cursor to freeze the header. Here are the steps to follow:
1. Place the cursor on the top-left part of the Sheet.
2. Hover the mouse on the empty square until a hand-like cursor is displayed.
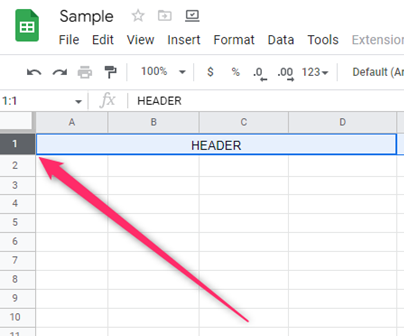
3. Using the left-mouse key, drag the hand-like cursor down and bring it below line one.
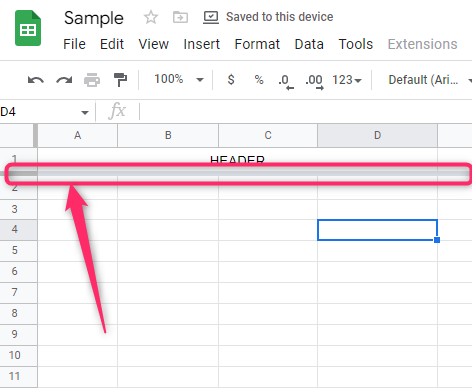
4. That’s it. Your row one will be frozen.
How to View Header and Footer in Excel
a) How to view header and footers
Steps to follow:
1. Open the Excel document you want to view the headers and footers
2. Click on the File tab on the toolbar. Alternatively, press the CTRL + P keys.

3. In the info screen, click on the Print button.
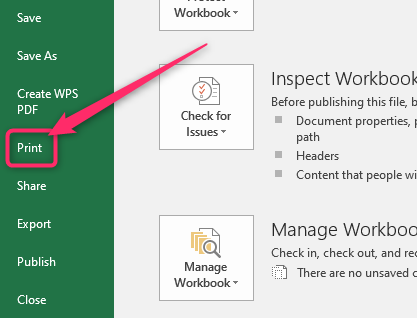
4. In the Print section, click on the Page Setup button.
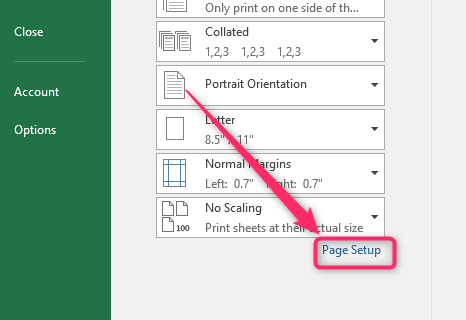
5. Click on the Header/Footer tab from the page-setup box.

6. From this section, you can view the headers and footers of your document.
b) How to add Headers and Footers
Steps:
1. Open the Excel document you want to view the headers and footers
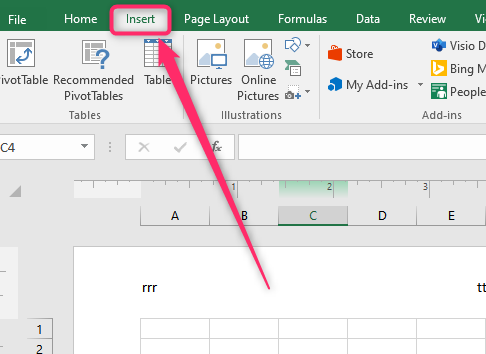
2. Click on the Insert tab on the toolbar. Locate the Text section, and click on the Header &Footer button.

3. The Header and footer spaces will appear on your document.
4. Edit and customize the header and footer.
c) To freeze header or footer in Excel
Steps:
1. Open the Excel document you want to freeze the headers and footers
2. Click on the Deader or Footer you want to freeze.
3. Click on the View tab, and locate the Freeze panes button.

4. Click on it, and select the option of freezing you want.

