When it comes to editing images, colors play an important role. GIMP colors menu has the tools you can use to manipulate the colors of an image. The tools define the color temperature, balance, curves, tones, saturation, and many other aspects of the image. They help you work with colors in GIMP using various methods. We will provide you with the methods you can use to work with colors in GIMP.
How to change hair color in GIMP
Table of Contents
You can change hair color in GIMP by using the following steps:
1. Open GIMP on your computer.

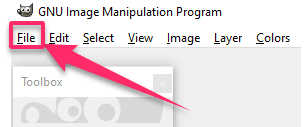
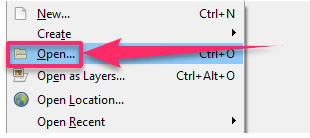
2. Go to File.
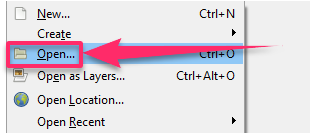
3. Click on Open.

4. On the Open Image dialog that appears, navigate through the folders in the Places panel and Name panel until you find your image name.
5. Click on the image you would like to open.
6. Click on the Open button.
7. Click on Layer.

8. Select New Layer to create a new layer of the image.
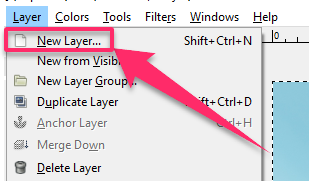
9. The New Layer window opens.
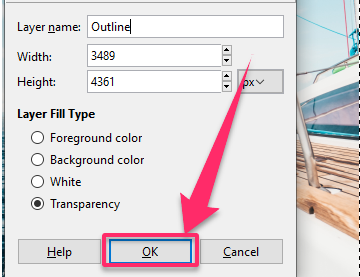
10. Type a name in the Layer Name text box.

11. For the Fill With, select Transparency.

12. Click on OK.
13. Click on the Foreground Color box.

14. On the Change Foreground Color dialog box that appears, select a color.
15. Click OK.

16. Go to Edit.

17. Click on Fill with FG color.

18. Change the blend mode to Overlay.

19. Ensure the Hair Color layer is selected in the Layers dialog.
20. Click on Layer.

21. Select Add Layer Mask.

22. On the Add Layer Mask dialog box that appears, select Black (Full Transparency).

23. Click on the Add button.

24. A thumbnail of the layer mask pops up to the right thumbnail of the Hair Color layer Dialog.
25. Select white color for the foreground color by pressing D on the keyboard to reset the background or foreground color to default and then press X to swap its color.
26. Click on Tools.

27. Select Paint Tools.
28. Click on Paintbrush.

29. On the Tool options dialog, select a soft brush.
30. Ensure you have selected the layer mask thumbnail by clicking on it.
31. Apply brush strokes to the layer mask to reveal the new color using your mouse.
32. To apply a natural color, Click on Filter.

33. Select Blur.
34. Click on Gaussian Blur.

35. Click on the Eraser tool icon and apply brush strokes to the hair to clean up.

36. Go to File.

37. Click on Save to save the file.

Your hair color should now be successfully changed to the color of your choice.
How to fill the selection with color in GIMP
In GIMP, you can use the Bucket Fill tool to fill your selections with color. The Bucket Fill tool is designed to fill a selection intelligently. You can fill the selection with color in GIMP by using the following steps:
1. Open GIMP on your computer.

2. Go to File.

3. Click on New or Open to load the file you want to fill the selection with color.
4. Make a selection by using any of the selection tools by going to Tools.

5. Click on the Selection Tools menu and draw a shape.
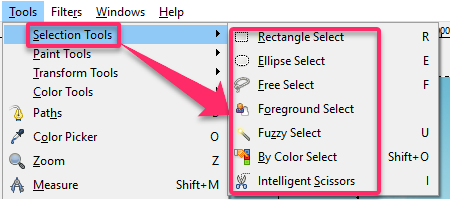
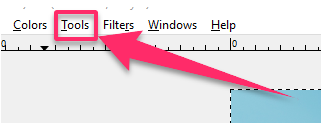
6. Go to the Tools menu.
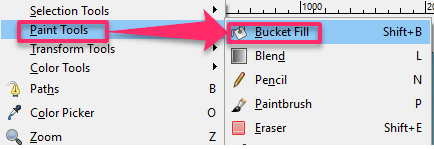
7. On the Paints Tools menu, select the Bucket Fill that is shown as a bucket icon.
8. On the Tools Options window that appears, select one of the Bucket Fill Options.
9. Select either FG Color Fill, BG Color Fill, or Pattern Fill.

10. Fill in the color.
Your selected area should now be filled with the color that you have chosen to use.
How to select all of one color in GIMP
In GIMP, you can use the Select By Color tool to easily select areas of an image with a similar color. You can select all of one color in GIMP by using the following steps:
1. Open GIMP on your computer.
2. Go to File.

3. Click on Open to open your image in GIMP.
4. In the Toolbox, click on Select By Color.

5. Select an area that matches the color you want to work with.
6. You can change the Threshold if the selected area does not contain all the areas you want. The threshold is the number of colors away from the original color that you want GIMP to add to the selection.

7. After adjusting the Threshold, click on the area of the image again, and you will notice a greater area being selected.
8. If you want to change the selection colors, go to the Colors menu.
9. Select Hue-saturation.

10. In the Hue-saturation dialog that opens, you can use the sliders to adjust the Lightness, Hue, and Saturation.

11. To remove the selection, go to the select menu.
12. Select None.

You can see that the result at first might not be perfect, but you can perfect the steps by practicing more.
How to blend colors in GIMP
In GIMP, you can use the blend tools that allow you to blend more than two colors for different reasons. You can blend the colors in GIMP by using the following steps:
1. Open GIMP on your computer.

2. Go to File and click on New to open a new document.

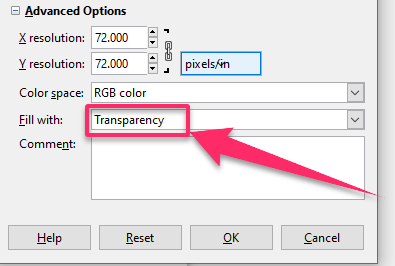
3. Go to the Transparency option from the Fill with the option to make a transparent background.
4. Take the Gradient tool from the tool panel that is the blending tool.

5. Take a preset gradient from the list that appears.

6. To draw a gradient with the blend tool, click on the starting of the document on the left side, then drag it to the opposite side.
The colors of the blend tool will blend as you go forward in the direction you have chosen.
How to invert colors in GIMP
The invert command inverts all the colors in the pixel and brightness value in the current layer as if the image is being converted to a negative. You can invert colors in GIMP by using the following steps:
1. Open the image in GIMP.
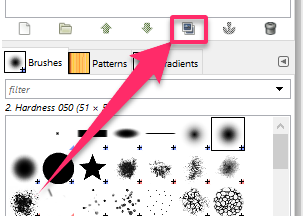
2. Duplicate the image layer and rename it Color Invert.
3. On the menu, Click on Colors.

4. Select Invert.

The colors in your image will be inverted, creating a negative color effect.

