In Word, columns are used to divide the word page into sections. In most cases, the column size is uniform, and it’s upon the user to adjust. In this article, we shall discuss creating and customizing the columns in Word. Let’s get started.
Creating column in Word
Table of Contents
Here are the steps to add a column to your document:
1. To get started, locate the Word application on your Pc. Double-click on it to open the application. To create a new document, click the File button on the toolbar. Then, locate the New button.
You can also use the keyboard shortcuts to open a new document. That is, CTRL + N. Alternatively, open an existing document that you need to add the columns.

2. Select or highlight the text you want to split into columns. To select all the readers, press the CTRL + A keys. To choose a section of your document, press the left mouse, and then move the cursor over the text you want to select.

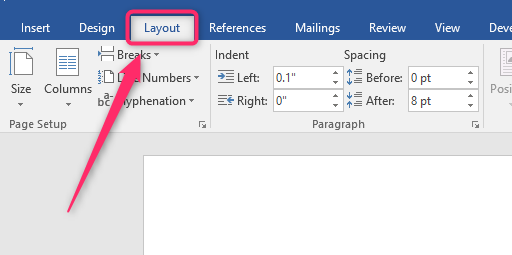
3. On the toolbar section, click on the Layout tab.

4. Locate the page setup section, then click on the Columns drop-down button.
5. From the drop-down menu, choose the columns you want to apply to your document.
Note:
You can create your page column using the table tools and customize the width of the cells.
Changing column spacing
Method 1
Here are the steps to follow:
1. Open the Word document you want to alter with its column. Alternatively, click the File button on the toolbar. Then, locate the Open button.
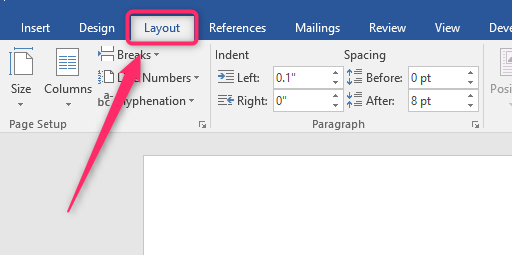
2. On the toolbar section, click on the Layout tab.

3. Locate the page setup section, then click on the Columns drop-down button.
4. Click on the More columns button.

5. In the number of columns section, enter the numbers of columns your document should have.
6. Then, In the Spacing section, use the up or down arrows to change the sizing of your column.

7. On the Apply to section, click the drop-down button and select where the changes should apply.
8. Finally, click the Ok button to save changes.
Method 2
Here are the steps to follow:
1. Open the Word document you want to alter with its column. Alternatively, click the File button on the toolbar. Then, locate the Open button.
2. On the toolbar section, click on the Layout tab.

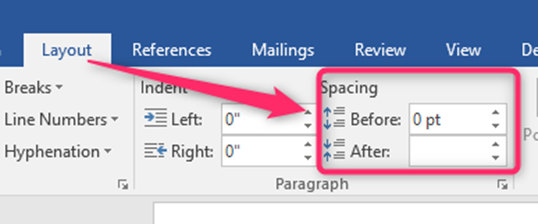
3. Locate the paragraph section. On the spacing section, use the up or down arrows to change the sizing of your columns.

Method 3: Use the indent tool
You can also use the indent tool to alter the spacing of the columns.
Here are the steps to follow:
1. Open the Word document you want to alter with its column. Alternatively, click the File button on the toolbar. Then, locate the Open button.
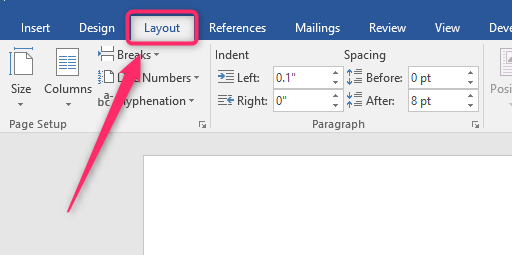
2. On the toolbar section, click on the Layout tab.

3. Locate the paragraph section. On the indent section, use the up or down arrows to change the sizing of your columns.


