Sometimes when you take a photo, it might be too small or too large when you are editing, and you might need to resize it. When resizing images, image editing applications like GIMP are perfect. Although GIMP allows for enlargements, it is advised to keep them to a minimum because quality can be easily lost. Enlargements might be used, for instance, when a document needs to be printed in a larger size or a picture needs to have a higher resolution while retaining document size. You can also reduce the size of the image. In GIMP, the technique for reducing a picture size differs only marginally from that for enlarging. If an image’s resolution is too high for the web, its file size is too enormous to send through email, or simply a small-sized image is needed for a printed piece, you may need to reduce its size. You can use methods to enlarge or reduce the image size in GIMP. We will provide you with these steps in detail and in a way you can follow easily.
You can change image size in GIMP by using the following steps:
1. Open GIMP on your computer.

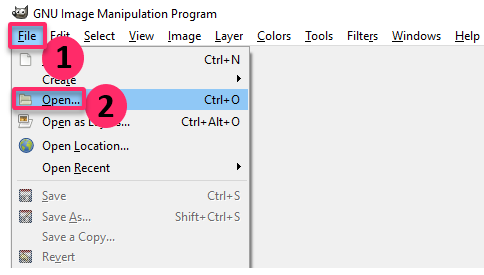
2. Go to the File menu.
3. Click on Open or New to open or create the image that you would like to center.
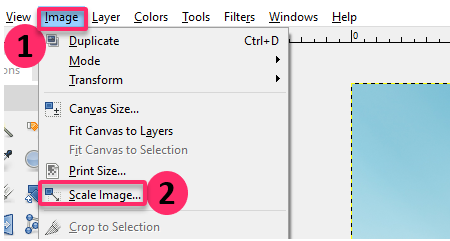
4. Go to the Image menu.
5. Click on Scale Image on the drop-down menu that appears.
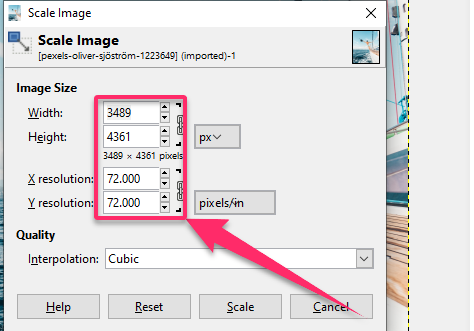
6. A Scale Image dialog box appears.
7. Enter the new Image Size and Resolution values in the Scale Image dialog box depending on whether you want to expand or reduce the image size according to your preferred size.
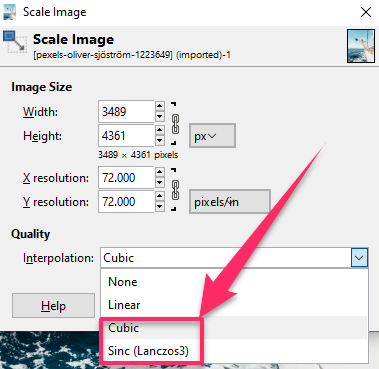
8. If you are reducing the image size, select your sampling method before you finish because GIMP will do away with unused pixels to reduce the image size.
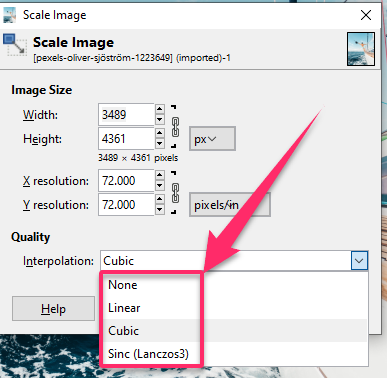
9. You can select Cubic to compute the color of every pixel as the average color of the right closest pixels in the original image.
10. Select Sinc (Lanczos3) to perform a high-quality interpolation by using the Sinc mathematical function.
11. If you are enlarging the image, select the interpolation method to create new pixel information to enlarge the image.
12. Select either the Cubic or Sinc (Lanczos3) options.
13. Click on Scale to accept the changes.
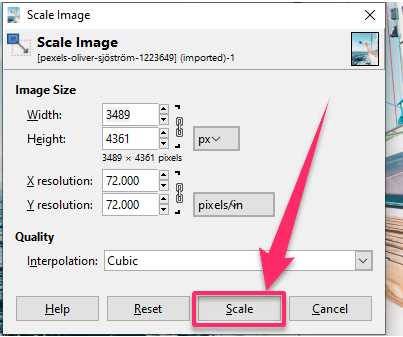
Your image will now be either reduced or enlarged according to how you want to change its size. Note that you should always adjust the sampling method after you are done selecting the sizes of the image you want to use. If you do not, your image might turn out disoriented, especially if you are expanding the size of the image. Its quality will be reduced. To maintain the quality ad outlook of the image, it is important not to skip this step. All the best as you work on changing the size of the rest of your images!

